Most dog owners think about slippery floors — but few think about flooring transitions. The small lip between tile and hardwood. The metal strip in a doorway. The raised threshold leading to a patio.
To us, they’re barely noticeable. To your dog’s knees, they can be a daily stress test.
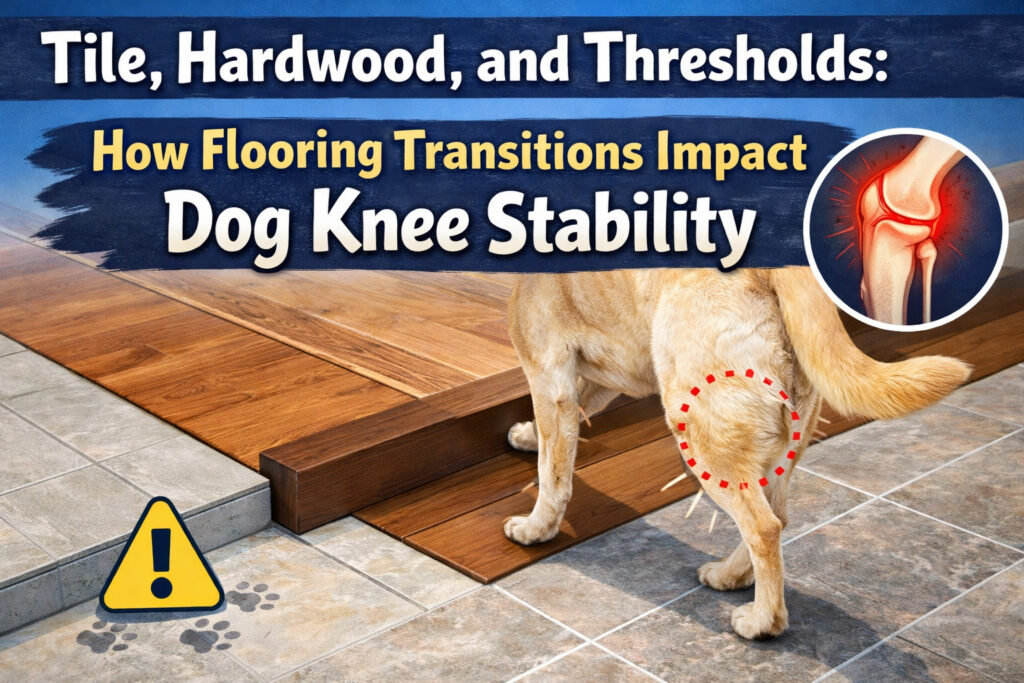
Dogs move fast. They don’t slow down to evaluate surface changes the way we do. When your dog runs from carpet to tile or hardwood to laminate, the sudden shift in traction can cause:
Over time, these repeated micro-adjustments can strain the CCL (ACL equivalent) — especially in active or larger dogs.
Raised door strips and uneven transitions are particularly risky because they:
For dogs healing from a previous CCL tear, these small obstacles can increase the chance of re-injury or strain on the opposite leg.
Take a walk through your house and look for these trouble spots:
You may notice your dog hesitates, shifts weight awkwardly, or slightly slides when crossing them.
You don’t need a renovation to protect your dog’s knees. Try:
Small adjustments can significantly reduce torque and instability in the knee joint.
Dog knee injuries are often the result of cumulative strain — not just dramatic accidents. Flooring transitions create subtle instability that can add up over time.
By identifying and correcting these hidden hazards, you’re not just improving traction — you’re protecting long-term joint health and giving your dog a safer environment to move confidently every day.
If you would like more information about our Posh Dog Knee Brace, please contact us through our contact form and be sure to visit us on Facebook to stay updated on tips, support, and new products for your dog’s joint health and recovery.
Articles from the Posh Dog Knee Brace team — a group effort with our licensed veterinary technicians and brace specialists, sharing 15+ years of experience helping dogs recover from CCL/ACL injuries and mobility challenges.
Our dogs are incredible athletes, companions, and adventurers. Whether they’re fetching a ball with gusto, scaling a hiking trail, or simply navigating the daily terrain of our homes, their muscles, joints, and soft tissues are constantly at work. And just like us, all that activity can lead to soreness, stiffness, and even minor aches.
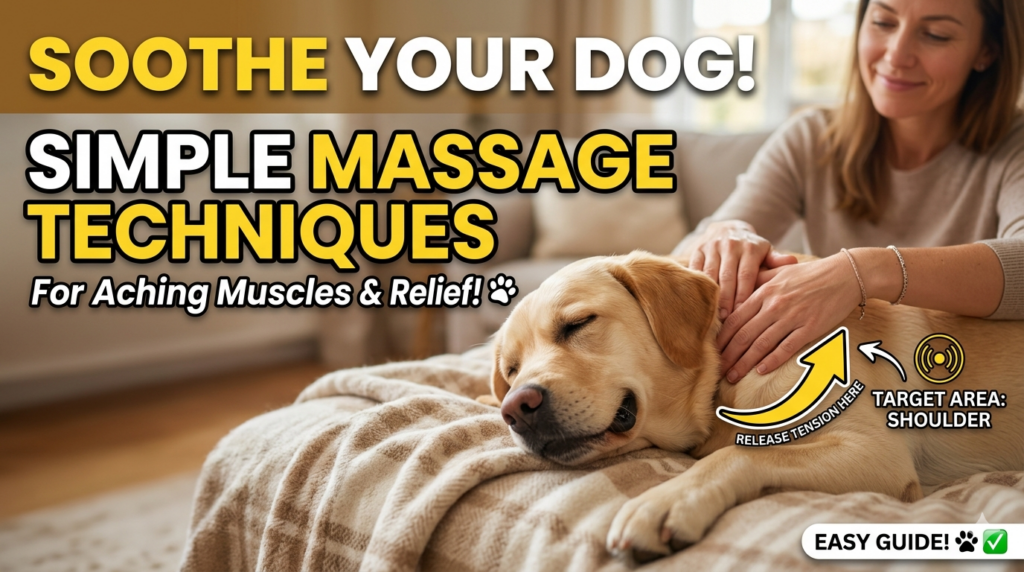
While professional canine massage therapy is a fantastic specialized service, you, as a dog owner, hold a powerful tool right at your fingertips: gentle massage. It’s not just a luxurious treat; it’s a therapeutic practice that can significantly contribute to your dog’s physical well-being, reduce pain, aid in recovery, and deepen the bond you share.
This guide will unlock the power of touch, providing you with simple, safe techniques to help soothe your dog’s aching muscles, improve circulation, and enhance their overall comfort and relaxation.
The benefits of regular, gentle massage for dogs extend far beyond simply making them feel good (though that’s a huge plus!):
Before you begin, set the stage for success:
Remember, the goal is gentle relaxation and therapeutic touch, not deep tissue manipulation unless guided by a professional. Always work with your dog, not against them.
1. The Full Body Stroke (The Opener)
2. Neck and Shoulders (Tension Releasers)
3. Back & Spinal Muscles (Careful & Calming)
4. Hip and Hind Leg Circles (Mobility Boosters)
5. Chest and Front Legs (Support & Stability)
6. Paws (Often Overlooked, Highly Sensitive)
By incorporating these simple massage techniques into your routine, you’re not just providing physical relief; you’re offering comfort, reassurance, and an invaluable form of communication that strengthens the incredible bond you share with your beloved dog.
Have questions about getting your pup back on their paws? Drop us a line through our contact form or follow us on Facebook to stay connected!
Articles from the Posh Dog Knee Brace team — a group effort with our licensed veterinary technicians and brace specialists, sharing 15+ years of experience helping dogs recover from CCL/ACL injuries and mobility challenges.
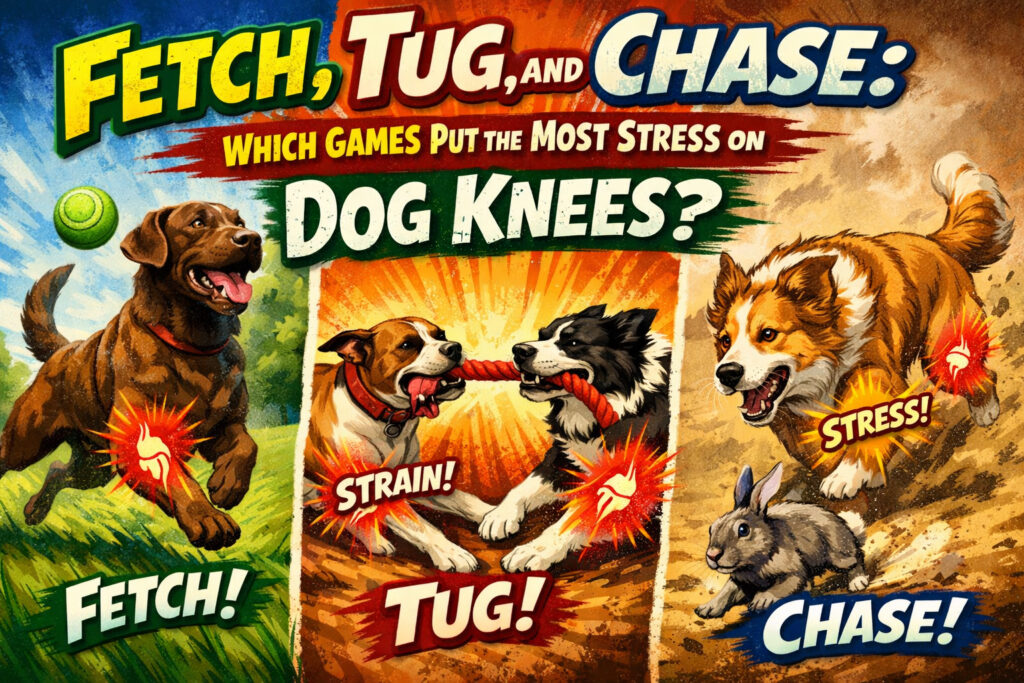
Play is one of the great joys of dog ownership — it builds bond, burns energy, and keeps pups mentally sharp. But some games put more mechanical load on a dog’s stifle (knee) than others, and repeated awkward landings, sudden turns, or sustained strain can increase the chance of injuries such as cranial cruciate ligament (CCL) rupture. Below I break down the three most common play styles — fetch, tug, and chase — explain how each stresses the knee, point to what the research and vets say, and give practical ways to keep play fun and safe.
Large-scale veterinary reviews and studies show that CCL rupture is common and multi-factorial — genetics, body weight, age, and activity type all matter. Fitness and core strength help lower risk, while high-intensity competitive sports (e.g., flyball, some obstacle work) are associated with more stifle injuries.
Fetch often looks harmless, but the main risk to knees comes from jumping and landing. A dog sprinting at full speed, leaping for a ball or frisbee, and then coming down on hard or uneven ground experiences sudden peak vertical forces through hips and stifles. Awkward rotations on landing (if the dog twists to chase or the surface is slippery) are what commonly strain ligaments. Veterinary guidance warns that long, repetitive sessions — or throwing high, erratic throws that force big leaps during fetch — increase the chance of acute or cumulative injury.
How to make fetch safer
Tug-of-war feels intense, but biomechanically it’s different: it’s mostly a pulling-and-holding game, not one full of high jumps or sudden multi-directional turns. That means knees typically take less violent impact compared with fetch or chase. Still, tug has its hazards: sudden lunges, jerking motions, or dogs bracing with legs splayed can put strain on shoulders, necks, and sometimes the stifle — especially if play is rough or if the dog is already injured. Experts recommend playing tug with rules (start/stop cues) and appropriate toys, and avoiding rope toys that fray and can become dangerous if ingested.
How to make tug safer
Chase games (especially those that simulate prey — e.g., someone dashing away while the dog zig-zags after them) can be deceptively risky. The dangerous element isn’t just speed but rapid decelerations and sharp pivots. When a dog makes a high-speed pursuit then suddenly turns or plants to change direction, torsional forces go through the knee — and repeated or extreme pivots are strongly linked to stifle injuries in athletic dogs. Studies of agility and working dogs show that quick turns, landings, and repetitive high-load maneuvers are associated with higher stifle injury rates.
How to make chase safer
If we rank purely on knee stress potential:
That said, risk is contextual. A two-hour unsupervised ball-throwing session on a rock-hard surface can be worse than a five-minute supervised frisbee toss on soft turf. Similarly, a young, unconditioned working-breed sprinting through tight turns is more vulnerable than a fit, adult dog doing the same.
Certain dogs are more likely to suffer stifle injuries: large and giant breeds, overweight dogs, dogs with certain conformational or genetic predispositions, and dogs that are under-conditioned (poor core strength). Conversely, dogs with good conditioning, balanced body weight, and controlled play tend to fare better. A veterinary review and related research emphasize that fitness and core strength reduce ligament tear odds, while some high-intensity sports elevate risk.
If your dog limps, is reluctant to bear weight, shows swelling around the knee, or has sudden changes in activity level after play — pause all strenuous activity and consult your veterinarian. Early evaluation can spot ligament strains before they become full ruptures.
No single game is “always safe” or “always dangerous.” The difference lies in intensity, surface, frequency, the dog’s body, and how you manage play. Chase and repetitive, high-impact fetch jumps carry the most potential to stress a dog’s knees, while tug is typically lower-impact for stifles if played sensibly. Use controlled play, conditioning, and common-sense safeguards to keep the zoomies joyful — and knees intact. For breed- or dog-specific advice, ask your veterinarian; they can assess risk factors and recommend conditioning or alternative activities tailored to your pup.
For more information on how the Posh Brace can support your dog’s recovery and joint health, feel free to reach out via our contact form or visit our Facebook page to see it in action.
Articles from the Posh Dog Knee Brace team — a group effort with our licensed veterinary technicians and brace specialists, sharing 15+ years of experience helping dogs recover from CCL/ACL injuries and mobility challenges.
When you have more than one dog, life is usually full of movement—shared zoomies, backyard wrestling matches, synchronized barking at the mail carrier, and group excitement at the sound of car keys. But when one dog suffers a knee injury, everything changes.
Whether your dog has experienced a cranial cruciate ligament (CCL) tear (often referred to as an ACL injury), had surgery, or is being managed conservatively, your entire household routine needs adjustment. The challenge isn’t just protecting the injured knee—it’s managing energy, space, and interactions so healing can happen safely. If you’re navigating multi-dog life during recovery, here’s how to keep everyone safe and sane.
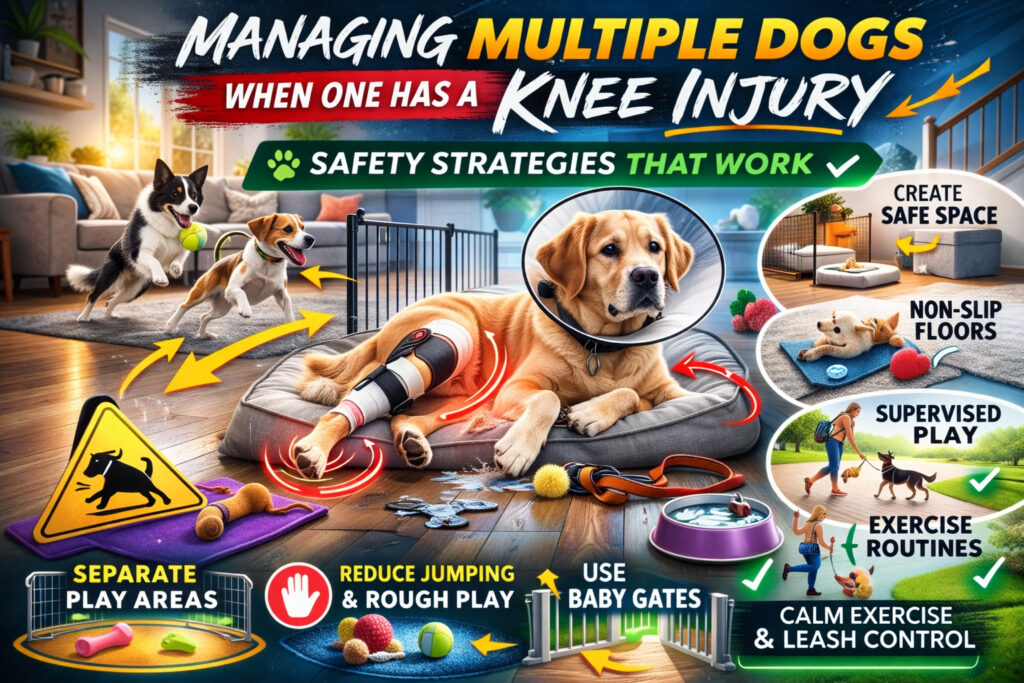
Dogs don’t operate on “light duty” naturally. They communicate and play physically. Even calm dogs can bump, chase, or initiate play without warning.
After common surgical repairs or bracing:
…controlled movement is essential for proper healing.
Unplanned wrestling or sudden chasing can:
In multi-dog households, prevention requires structure—not just hope.
You don’t necessarily need to isolate your injured dog 24/7—but you must manage high-energy moments.
Common trigger times include:
During these times, use:
Prevention is always easier than correcting excitement once it starts.
It may feel excessive, but short-term indoor leash management can be extremely effective.
Keep your recovering dog on a lightweight leash indoors so you can:
If other dogs are excitable, leash them too during shared time. Calm coexistence is the goal—not total separation, but structured interaction.
Even gentle play can escalate quickly.
During knee recovery:
It only takes one pivot or collision to undo weeks of healing.
Instead, provide:
Remember: Physical rest doesn’t mean emotional isolation.
If you have a fenced yard, don’t assume it’s safe for unsupervised group turnout.
Options that work:
Backyard sprints are one of the biggest causes of reinjury. If your other dogs are high-drive breeds, this becomes even more important. Excitement spreads quickly in a group.
Food increases competition and energy.
Best practices:
Guarding behaviors—even mild ones—can trigger sudden lunging.
You want predictability and calm during recovery.
Your injured dog needs a designated safe space.
This area should:
A crate or exercise pen provides structure and safety—especially in early post-op weeks.
The recovery zone isn’t punishment. It’s protection.
Here’s something many owners don’t realize:
Dogs who tear one CCL often injure the other within 1–2 years. Using a Posh Dog Knee Brace can significantly decrease this risk, sometimes by 70%.
In multi-dog households, overcompensation risk increases because:
Protecting the healing leg also protects the opposite knee. Controlled, symmetrical movement is essential.
One common mistake? Letting the entire household energy drop drastically.
Your healthy dogs still need:
If they don’t get it, they’ll redirect that energy toward the recovering dog.
Schedule:
A tired dog is a calm dog—and calm dogs protect healing knees.
Multi-dog households tend to erupt when someone enters the home.
To manage this:
Excited pack greetings can involve jumping, circling, and bumping—all dangerous during recovery.
Calm entrances set the tone.
Recovery is a great time to reinforce impulse control.
Teach:
Structured training strengthens communication and lowers chaos.
Dogs thrive on clarity.
Watch for:
Intervene early.
Don’t wait for escalation.
If you see play energy building, separate before it turns physical.
Until your veterinarian clears full activity, assume that unsupervised time is unsafe.
Even bonded dogs can:
Short-term vigilance prevents long-term setbacks.
When your veterinarian confirms healing progress, don’t immediately return to full-speed play.
Instead:
Muscle strength takes time to rebuild—even after surgical repair.
Healing bone does not equal fully conditioned muscle.
It’s easy to feel guilty separating dogs or limiting activity.
But remember:
You are preventing reinjury.
You are protecting thousands of dollars in surgery.
You are avoiding prolonged pain.
Recovery is temporary. Chronic instability is not.
Dogs sense stress in the household.
Maintain:
Your injured dog needs emotional stability as much as physical rest.
Isolation without interaction can increase anxiety, which leads to restless behavior.
Balance is key.
Managing multiple dogs when one has a knee injury isn’t about isolating the injured dog from the family—it’s about controlling variables during healing.
Success comes from:
Recovery from a CCL injury isn’t just medical—it’s environmental.
Your home becomes part of the treatment plan.
With intentional management, your injured dog can heal properly without creating chaos in the rest of your pack.
And when recovery is complete, your structured leadership may even leave your household calmer and more balanced than before. For more information about our Posh brace you can contact us via our contact form or visit us on Facebook.
Articles from the Posh Dog Knee Brace team — a group effort with our licensed veterinary technicians and brace specialists, sharing 15+ years of experience helping dogs recover from CCL/ACL injuries and mobility challenges.
Yes, dog knee braces can work effectively for many dogs with ACL (CCL) injuries by stabilizing the joint, reducing pain, and improving mobility—especially when combined with proper rest, weight management, and consistent use.
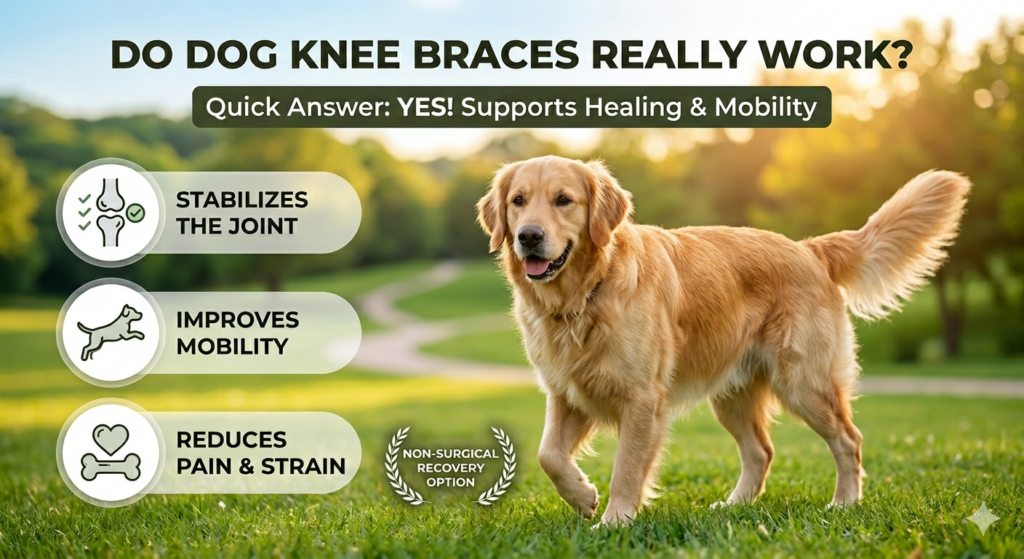
Dog knee braces are designed to support and stabilize the knee joint, which is critical when the ACL (CCL) ligament is torn or weakened.
They work by:
For many dogs, this added stability can significantly improve quality of life.
Dog knee braces are most effective in the following situations:
While braces are effective in many cases, there are situations where they may need to be combined with other treatments:
Here’s why many pet owners choose a brace:
Avoids invasive procedures and long recovery times
Surgery can cost thousands, while braces offer a more budget-friendly alternative
Provides stability as soon as your dog starts wearing it
Reduces strain on the knee and surrounding joints
Not all braces perform equally.
Best for: Moderate to severe injuries
👉 Many owners choose options like Posh Dog Knee Brace as an affordable custom solution that balances support and cost.
Best for: Mild injuries or temporary use
Some dogs show improvement within a few weeks, especially when:
More severe injuries may take longer and require a more structured recovery plan.
So, do dog knee braces really work?
For many dogs, the answer is yes—especially when the brace is well-fitted, used consistently, and combined with proper care.
While they may not replace surgery in every case, dog knee braces offer a proven, non-invasive option that helps dogs stay active, comfortable, and supported during recovery.
For more information, contact Posh Dog Knee Brace on our contact page or visit us on Facebook.
In some cases, yes—especially for smaller, older, or less active dogs. Many dogs recover successfully with a brace and proper care.
Many dogs begin showing improvement within a few weeks, though full recovery can take several weeks to months depending on the severity.
Yes, braces reduce strain on the injured joint, which can significantly decrease pain and improve comfort.
Most dogs can wear a brace for extended periods, but it’s important to follow proper guidelines and allow for breaks as needed.
Articles from the Posh Dog Knee Brace team — a group effort with our licensed veterinary technicians and brace specialists, sharing 15+ years of experience helping dogs recover from CCL/ACL injuries and mobility challenges.
If you’ve ever watched your dog suddenly bolt across the yard, spin in wild circles, and ricochet off the couch like a furry rocket — you’ve witnessed the legendary zoomies. Officially known as Frenetic Random Activity Periods (FRAPs), zoomies are completely normal and usually adorable.
But here’s the question many dog parents quietly worry about:
Can zoomies actually cause an ACL tear in dogs?
Let’s break down what really happens during those high-speed bursts — and what every owner should know to protect their pup’s knees.

In dogs, the ligament we commonly call the “ACL” is technically known as the cranial cruciate ligament (CCL). It stabilizes the knee joint and prevents the shin bone from sliding forward.
When this ligament tears or ruptures, it causes:
CCL tears are one of the most common orthopedic injuries in dogs.
The short answer: Zoomies alone usually don’t cause a healthy ligament to tear.
However, zoomies can be the moment when a weakened or degenerating ligament finally gives out.
Here’s why:
1. Most CCL Tears Are Degenerative
Unlike human ACL injuries (which are often sudden sports injuries), dogs typically experience slow ligament degeneration over time. The ligament gradually weakens due to:
By the time the ligament tears, it was often already compromised.
2. Zoomies Create Sudden Torque
During zoomies, dogs:
That sudden torque on a weakened knee can be the final straw. It’s not that zoomies are “dangerous” — it’s that they can expose an underlying issue.
Some breeds are more prone to CCL injuries, including:
If you have one of these breeds, it’s especially important to monitor knee health.
Before a full tear, you might notice:
These subtle signs often get dismissed — until a zoomie episode turns into a full rupture.
Absolutely not.
Zoomies are:
But there are smart ways to reduce injury risk.
🐾 1. Maintain Healthy Weight
Excess weight significantly increases strain on the knee joint.
🐾 2. Improve Traction
Slippery floors are a major risk factor. Consider:
🐾 3. Strengthen Supporting Muscles
Strong thigh muscles help stabilize the knee and reduce ligament stress.
🐾 4. Manage High-Impact Surfaces
Hard, uneven terrain increases torque. Grass is generally safer than tile or polished concrete.
🐾 5. Provide Preventative Support
If your dog has shown early instability, structured joint support and stabilization can help protect the knee during activity.
Here’s something many owners don’t realize:
When one CCL tears, the opposite knee has a high likelihood of tearing within 1–2 years.
Why?
Protecting the healthy leg becomes critical after the first injury.
Seek veterinary evaluation immediately if:
Early intervention can prevent further joint damage and arthritis progression.
Zoomies don’t create ACL (CCL) injuries out of nowhere.
But they can be the moment when a weakened ligament finally tears.
Instead of fearing zoomies, focus on:
That way, your dog can keep racing in joyful circles — safely.
If your dog has already experienced a CCL injury or you’re seeing early signs of instability, proactive knee support can make a significant difference in mobility and long-term joint protection.
Because every dog deserves to zoom — without the setback. 🐾 For more information about our brace you can contact us via our contact form or visit us on Facebook.
Articles from the Posh Dog Knee Brace team — a group effort with our licensed veterinary technicians and brace specialists, sharing 15+ years of experience helping dogs recover from CCL/ACL injuries and mobility challenges.
When we think about protecting our dogs’ knees, we usually picture slippery floors, rough play, or high-impact activities like jumping in and out of trucks. But what if one of the biggest contributors to knee strain is something you use every single day?
Your leash.
Leash walking seems simple. Clip it on. Head outside. Enjoy the stroll. But subtle leash handling mistakes can place repetitive strain on your dog’s knees—especially the stifle joint (the equivalent of the human knee). Over time, these small, daily forces can contribute to inflammation, soft tissue strain, and even ligament injuries.
If you’re committed to protecting your dog’s mobility and long-term joint health, this guide will help you spot and fix common leash mistakes that could be harming your dog without you even realizing it.
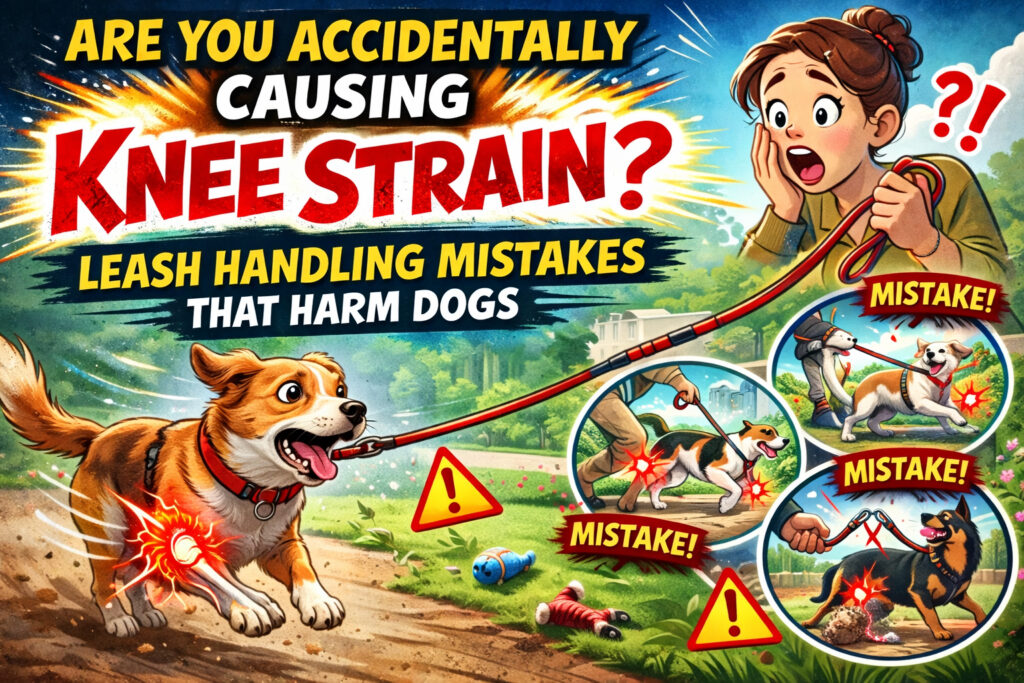
Before we talk about leash handling, it helps to understand what’s happening inside your dog’s leg.
The canine knee—called the stifle joint—relies heavily on soft tissues for stability, including the cranial cruciate ligament (CCL). Unlike humans, dogs carry about 60% of their body weight on their front limbs, but their rear legs generate powerful forward propulsion. When a leash interferes with natural movement patterns, the knees often absorb the consequences.
Sudden stops, lateral twisting, forced changes in direction, and constant pulling all create unnatural forces through the stifle joint. Over time, these repeated micro-stresses can add up.
Now let’s look at where leash handling plays a role.
Even if your dog isn’t actively pulling, a constantly taut leash subtly alters their gait. Instead of moving naturally, your dog braces against forward pressure. This shifts weight distribution and increases joint loading—particularly in the knees and hips.
Over months or years, that repeated strain can contribute to chronic inflammation or ligament fatigue.
Fix it: Practice loose-leash walking where the leash forms a relaxed “J” shape. The goal isn’t rigidity—it’s fluid movement.
Quick leash corrections create sharp, abrupt force that travels through your dog’s body.
When you jerk a leash, your dog instinctively plants their feet to resist. That sudden bracing action often causes twisting forces through the knees. If this happens repeatedly, especially in high-energy dogs, it can increase wear on stabilizing ligaments.
Even if you’re not intentionally correcting, accidentally snapping the leash when distracted can have the same effect.
Fix it:
Your dog’s joints will thank you.
Excited lunging is one of the biggest contributors to knee strain.
When your dog lunges forward:
If your dog lunges toward squirrels, other dogs, delivery trucks, or people regularly, those explosive starts and stops can create significant joint stress.
Over time, that repeated force increases the risk of:
Fix it:
Certain equipment can amplify joint stress instead of reducing it—especially if it changes how your dog distributes weight.
For example:
If your dog already has mild joint instability, poor equipment choices can worsen compensation patterns.
Fix it:
When in doubt, observe your dog walking from behind—are their hips swaying excessively? Are their knees rotating inward? Small alignment clues reveal big joint stress.
Leash tension plus slippery surfaces is a dangerous combination.
If your dog slips slightly while the leash is taut, the stabilizing ligaments in the knee must work overtime to prevent a fall. That micro-instability, especially repeated over time, can increase strain on the CCL.
This is especially important in:
Fix it:
Controlled steps are safer steps.
Some owners unconsciously “steer” their dogs by pulling them sideways.
But lateral pulling creates rotational torque through the stifle joint. Dogs aren’t designed to pivot sharply under external force. Sudden sideways redirection forces the knee to stabilize against unnatural angles.
Better approach:
Instead of pulling sideways, use body positioning. Turn your own body first. Encourage your dog to follow naturally. This reduces joint torque and encourages healthier movement patterns.
Leash-related knee strain rarely appears overnight.
Watch for subtle changes:
These may indicate early joint stress or instability.
Addressing leash habits early can prevent more serious injuries later.
Here’s what many owners don’t realize:
It’s rarely one big event.
Knee injuries often result from repeated micro-trauma over time. Daily lunging. Constant pulling. Minor slips. Abrupt corrections. Over months, those small forces add up.
This is especially true in:
Smart leash handling becomes part of preventive care—not just obedience training.
Here’s a simple checklist you can use starting today:
✔ Keep leash slack whenever possible
✔ Avoid jerking or snapping corrections
✔ Reduce repetitive lunging
✔ Choose equipment that promotes natural movement
✔ Slow down on slippery surfaces
✔ Use body positioning instead of forceful steering
✔ Monitor subtle gait changes
These small adjustments dramatically reduce unnecessary joint stress.
If your dog already shows signs of knee instability, mild CCL strain, or early joint weakness, modifying leash habits may not be enough.
External support during activity can:
Especially during rehabilitation or prevention phases, supportive bracing can protect the joint while you improve training and handling habits.
Mobility protection isn’t just about recovery—it’s about prevention.
Walks should:
But improper leash handling can quietly undermine all of that.
The good news? Small, intentional changes in how you handle the leash can dramatically reduce strain and protect your dog’s knees long-term.
You love your dog. You walk them to keep them healthy. You want them active and happy for years to come.
But even well-meaning habits can unintentionally place stress on sensitive joints.
By becoming aware of leash tension, lunging patterns, abrupt corrections, and equipment choices, you can transform daily walks from a hidden risk into a powerful tool for joint protection.
Protect the knees. Protect the zoomies. Protect the years ahead.
If you’re ever unsure whether your dog’s gait looks balanced or whether they may need additional support during activity, consult with your veterinarian and consider solutions designed specifically for canine knee stability.
Because mobility isn’t just about movement—it’s about freedom. For more information about our Posh brace contact us via our contact page or follow us on Facebook.
Articles from the Posh Dog Knee Brace team — a group effort with our licensed veterinary technicians and brace specialists, sharing 15+ years of experience helping dogs recover from CCL/ACL injuries and mobility challenges.
The dog park: a place of boundless energy, wagging tails, and the joyous freedom of off-leash play. For many dogs, it’s the highlight of their day—a chance to socialize, burn off energy, and revel in canine camaraderie. For owners, it’s an opportunity to watch their beloved pets thrive and connect with other dog enthusiasts.
However, the very freedom that makes dog parks so appealing can also make them unpredictable. Without proper etiquette and vigilance, a fun outing can quickly turn into a stressful experience, an argument, or, worse, an accident or injury. From minor scrapes to serious altercations or even the transmission of illness, the risks are real if everyone isn’t playing by the unwritten rules.
As owners of dogs, especially those prone to or recovering from joint issues, understanding and enforcing good dog park etiquette isn’t just about being polite; it’s about safety and responsibility. It’s about creating an environment where all dogs—and their humans—can enjoy themselves without unnecessary risks.
Here are 5 crucial rules to follow to ensure a safe, fun, and injury-free experience for everyone at the dog park.
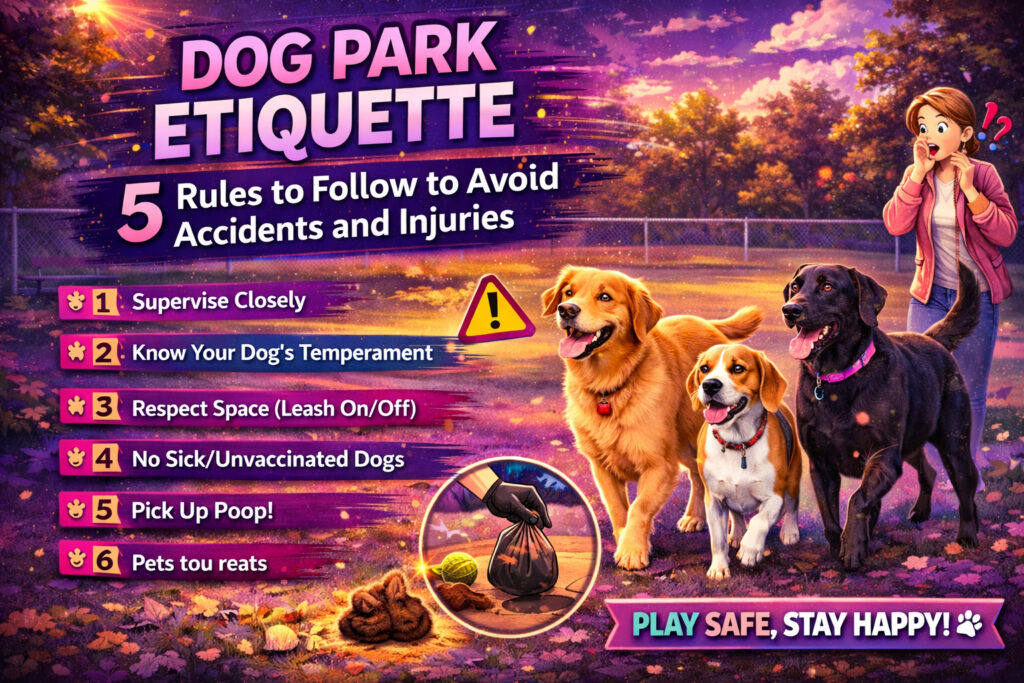
This is the golden rule, the foundation of all other etiquette. Your phone call, podcast, or chat with a friend can wait. When your dog is off-leash in an unfamiliar environment with other dogs, your full attention is required.
Not every dog is a “dog park dog.” Understanding your dog’s personality and physical capabilities is paramount.
Why it Matters: Bringing an unsuitable dog to the park puts them and every other dog at risk. Injuries can range from simple sprains to severe ligament tears or bone fractures from rough play or collisions.
The entryway and initial interactions are critical, and not all dogs are ready for off-leash play the moment they arrive.
The dog park is a communal space, and with that comes a shared responsibility for public health.
This might seem obvious, but it’s astonishing how often it’s ignored.
The dog park can be a wonderful resource for well-socialized, healthy dogs and attentive owners. By committing to these 5 essential rules of etiquette, you contribute to a safer, cleaner, and more enjoyable environment for every four-legged friend and their human companions. Prioritize safety, pay attention, and let’s make every dog park visit a positive experience!
At Posh Dog Knee Brace, we are committed to helping your pup stay active and safe; for more information about our bracing options, feel free to reach out via our contact form or join our community on Facebook.
Articles from the Posh Dog Knee Brace team — a group effort with our licensed veterinary technicians and brace specialists, sharing 15+ years of experience helping dogs recover from CCL/ACL injuries and mobility challenges.
For many dog owners, daily walks are simply part of caring for their pet. But what many people don’t realize is that exercising with your dog benefits both of you in powerful ways. From improving physical health to strengthening the emotional bond you share, staying active together can make a huge difference in your overall well-being.
Dogs naturally thrive on movement, and when their owners join them in regular exercise, it creates a healthier and happier lifestyle for both human and canine.

Regular exercise is essential for maintaining a healthy body—for both people and dogs. Activities like walking, running, hiking, or playing fetch help keep muscles strong, improve heart health, and maintain a healthy weight.
For humans, exercising with your dog can:
For dogs, regular exercising can:
Many dogs suffer from weight gain due to lack of exercise. When owners commit to an active routine, it helps prevent common health problems such as joint stress and mobility issues.
Exercising is more than just physical movement—it’s quality time spent together. Dogs are social animals and thrive when they feel connected to their owners.
When you run, hike, or play together, your dog sees it as a shared activity and a form of engagement. This strengthens trust, improves communication, and reinforces your relationship.
Dogs that regularly exercise with their owners often show:
Simply put, active dogs tend to be happier dogs.
One of the biggest benefits of exercising with your dog is how it improves mental health for both of you.
Physical activity naturally releases endorphins, the chemicals that help reduce stress and improve mood. Spending time outdoors with your dog can help you clear your mind, relax, and feel more positive.
Dogs benefit mentally as well. Exercise helps reduce:
A tired dog is usually a calm and content dog.
One of the hardest parts of maintaining a workout routine is staying consistent. Dogs naturally help solve this problem because they rely on routine.
Your dog will remind you when it’s time for a walk or playtime, encouraging you to stay active even on days when you might not feel motivated.
This built-in accountability makes it easier to maintain a regular exercise habit. Over time, this routine becomes a healthy lifestyle for both you and your dog.
Movement is essential for maintaining healthy joints and muscles in dogs. Regular exercise helps keep joints lubricated, muscles strong, and weight under control—all of which contribute to better mobility.
For active dogs, especially larger breeds or aging pets, joint support becomes even more important. Activities like controlled walking, swimming, and light running can help maintain joint strength while reducing stiffness.
Providing the right support and staying consistent with exercise can help dogs stay active and comfortable for many years.
There are many enjoyable ways to stay active together. Some popular activities include:
The key is to find activities that match your dog’s energy level, breed, and age.
Exercising with your dog is one of the easiest and most rewarding ways to improve your health while also enriching your pet’s life. Regular activity helps maintain physical fitness, improves mental well-being, and strengthens the bond between you and your dog.
Whether it’s a morning walk, an afternoon hike, or a game of fetch in the backyard, every bit of movement counts. When you stay active together, you’re not just exercising—you’re building a healthier, happier life for both you and your dog.
For more information about our Posh Dog Knee Brace and how it can help support your dog’s mobility and recovery, please visit our contact page on our website or connect with us on Facebook to learn more and get in touch with our team.
Articles from the Posh Dog Knee Brace team — a group effort with our licensed veterinary technicians and brace specialists, sharing 15+ years of experience helping dogs recover from CCL/ACL injuries and mobility challenges.
Hi everyone! My name is Nikki, and I’m the Lead Veterinary Technician with Posh Dog Knee Braces. Today I want to talk about something extremely important for dog owners, especially during the warmer months when we all love getting outdoors with our pets. Swimming in rivers, lakes, and ponds can be a fun activity for both dogs and their humans, but there is a hidden danger that many pet owners are unaware of. That danger is something called blue-green algae, often simply referred to as blue algae.
This type of algae can be incredibly toxic and even deadly for dogs. Every summer, veterinary clinics see tragic cases involving dogs that were exposed to this toxin after swimming in or drinking from contaminated water. Unfortunately, many dog owners have never heard about this risk until it’s too late. My goal with this blog is to help educate you about blue algae, explain why it’s so dangerous, and give you some practical tips to help keep your dog safe while still enjoying summer adventures.
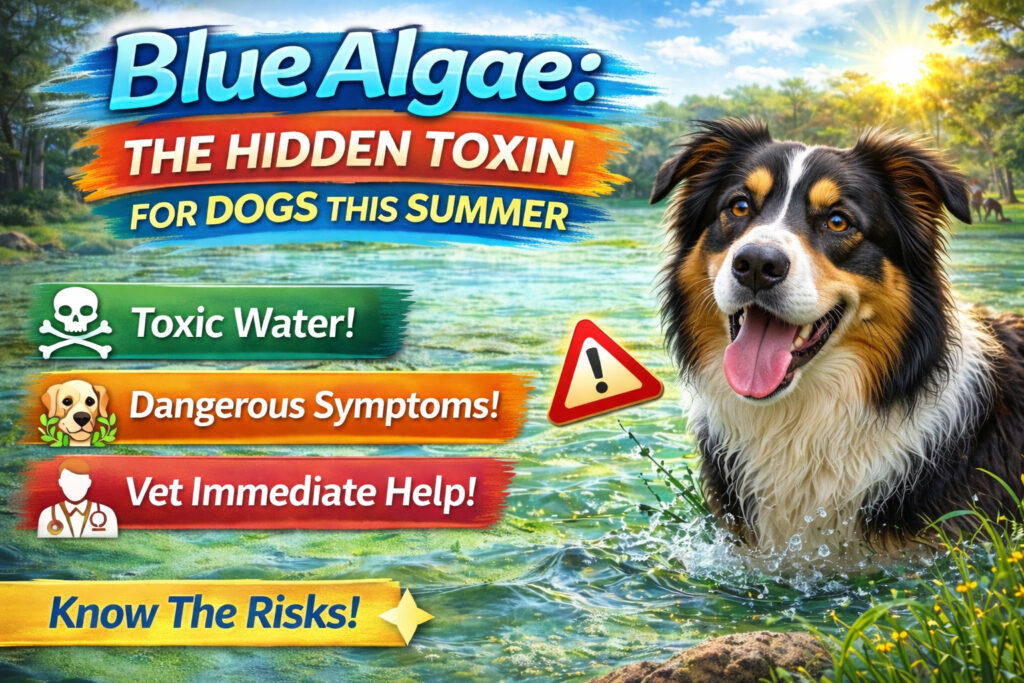
Blue-green algae is not actually algae in the traditional sense. It is a type of bacteria known as cyanobacteria that thrives in warm, nutrient-rich water. These bacteria can grow rapidly and form what are called algal blooms, which are dense layers that appear on the surface of water.
These blooms often occur in stagnant or slow-moving bodies of water, such as ponds, lakes, and certain areas of rivers. When conditions are right—typically warm temperatures, sunlight, and excess nutrients in the water—the bacteria multiply very quickly. This is why blooms are most commonly seen during the summer months, especially from July through August, although they can occur earlier or later depending on the climate.
One of the most dangerous things about blue-green algae is that it can produce powerful toxins that are extremely harmful to animals and humans. Dogs are particularly vulnerable because they often drink the water they swim in, and they may lick algae off their fur after leaving the water.
The toxins produced by blue-green algae attack the body very quickly. In many cases, symptoms begin appearing within minutes to hours after exposure. The toxins can affect several major organs, including the liver and nervous system, which is why poisoning from blue algae can progress rapidly and become life-threatening in a short amount of time.
Dogs that ingest contaminated water may experience symptoms such as:
In severe cases, dogs may go into organ failure or cardiac arrest. Sadly, once symptoms progress, treatment options can be limited and outcomes are often poor.
Over the course of my veterinary career, I have personally witnessed dozens of beautiful dogs lost to this toxin, and it is absolutely heartbreaking every single time. Many of these families had no idea the water their dog swam in contained a deadly hazard.
Blue algae tends to develop in areas where water is warm, calm, and nutrient-rich. This means it often appears in places that might otherwise look peaceful and inviting.
Common locations include:
Sometimes blooms appear as a green, blue-green, or even reddish film on the surface of the water. It may look like paint spilled across the top of the water, pea soup, or thick green scum. However, not all blooms are easy to recognize. Some may simply appear as cloudy or discolored water.
This is why it’s extremely important to avoid letting your dog swim in water that has visible algae or moss, unless you know the area is regularly tested and confirmed to be safe.
Even the most beautiful and remote lakes can contain toxic algae during certain times of the year. Just because the water looks clear or natural does not necessarily mean it is safe.
Many people assume this issue only happens in large lakes or natural bodies of water. Unfortunately, that is not always the case. Blue algae can develop almost anywhere that stagnant water collects, even in areas close to home.
I once worked with a family that had a small pug who tragically died after exposure to blue algae in their own backyard. The source of the contamination was something they had completely forgotten about—an old fish tank that had been left outside.
Over time, rainwater collected inside the tank, creating a small stagnant pool. Eventually, the conditions allowed blue algae to develop in the water. Their dog drank from it, and by the time the family realized something was wrong, it was already too late.
When the water was tested afterward, it came back positive for blue algae toxins.
This heartbreaking situation shows that dangerous algae blooms can occur in places we might never think to check. Any container, pond, or standing water source can potentially become a breeding ground under the right conditions.
The good news is that with awareness and caution, many cases of blue algae poisoning can be prevented. Here are some simple but important steps you can take to protect your dog.
If you see green scum, mats of algae, or water that looks discolored or thick, do not allow your dog to swim or drink from it.
Many parks and local authorities test popular lakes and swimming areas during the summer months. If a harmful algae bloom is detected, warnings are usually posted.
When hiking or visiting lakes and rivers, always bring clean drinking water for your dog. This reduces the chance they will drink from natural water sources.
If your dog swims in natural water, rinse them with fresh water afterward. This helps remove any algae that might be stuck in their fur and prevents them from licking it off.
Check your yard for items that may collect rainwater, such as buckets, containers, old tanks, kiddie pools, or clogged gutters. Empty these regularly to prevent stagnant water from forming.
If you believe your dog may have been exposed to blue algae, seek veterinary care immediately. Time is extremely critical in these situations.
Even if your dog only drank a small amount of water, it is better to err on the side of caution. Early treatment may improve the chances of survival.
Try to prevent your dog from licking their fur and, if possible, rinse them with clean water while heading to the veterinarian.
Summer adventures with your dog are some of the best memories we can make. Whether it’s hiking, camping, or swimming, spending time outdoors is wonderful for both you and your pet.
However, awareness of potential dangers like blue algae can make all the difference. Taking a few extra precautions can help ensure your dog stays safe while still enjoying the water.
Swimming can absolutely still be a fun activity—just make sure the area is safe and monitored. Avoid stagnant water with visible algae, stay informed about local conditions, and always keep fresh water available for your dog.
As a veterinary technician, I have seen firsthand how devastating blue algae poisoning can be for families. Losing a beloved pet is never easy, and it is especially heartbreaking when it happens so suddenly.
The purpose of sharing this information isn’t to scare anyone away from outdoor fun—it’s simply to help spread awareness. Many dog owners have never heard of blue algae until tragedy strikes.
If this blog helps even one person avoid that situation and keep their dog safe, then it is worth sharing.
So this summer, enjoy the sunshine, the lakes, and the adventures with your furry companions—but remember to play it safe and stay aware of your surroundings.
Your dog is counting on you.
Stay safe out there! 🐾
For more information about any of our products please contact us via our contact form or visit us on Facebook.
— Nikki
Lead Veterinary Technician
Posh Dog Knee Braces
Articles from the Posh Dog Knee Brace team — a group effort with our licensed veterinary technicians and brace specialists, sharing 15+ years of experience helping dogs recover from CCL/ACL injuries and mobility challenges.
When your dog starts limping, licking a sore spot, or showing signs of joint discomfort, your first instinct is to help them feel better—fast. One tool many pet owners reach for is a leg wrap. Simple in appearance but powerful when used correctly, dog leg wraps can provide support, protection, and relief in a variety of situations.
But not all dog leg wraps are the same—and using one incorrectly can do more harm than good. If you’re considering wrapping your dog’s leg, here’s what you need to know before you start.

A dog leg wrap is a flexible bandage or supportive material placed around part of your dog’s limb. Depending on the goal, it may offer light stabilization, gentle compression, or wound protection.
Dog Leg Wraps are commonly made from:
These wraps stick to themselves but not to your dog’s fur, which makes them easy to apply and remove. They’re often used for light support or to secure padding in place.
Breathable and absorbent, gauze is typically used directly over a wound before applying an outer wrap.
These provide firmer compression and support but require careful application. Too much tension can restrict circulation.
Cloth materials are sometimes used to hold dressings in place or offer mild support without significant compression.
The key is matching the material to the purpose.
A dog leg wrap isn’t a cure-all—but in the right situation, it can make a meaningful difference.
For mild sprains or soft tissue strains, a wrap can offer gentle stability and help reduce excessive motion. This may ease discomfort during short periods of activity or rest.
If your dog has a cut, abrasion, or post-surgical incision (as directed by your veterinarian), a wrap can shield the area from dirt and debris while keeping dressings secure.
Compression can sometimes help limit fluid buildup in cases of mild inflammation. This must be done carefully and monitored closely.
Dogs with arthritis or ongoing joint stiffness may benefit from light support during rest or limited movement. However, long-term joint instability often requires more structured support than a basic wrap can provide.
Some dogs fixate on irritated areas. A properly applied wrap may serve as a temporary barrier while the underlying issue heals.
Not all leg wraps serve the same function. Choosing the right approach matters.
These are designed to provide mild stabilization to joints that feel weak or sore. They are typically used short-term and under veterinary guidance.
These consist of a sterile dressing placed over the wound, covered by padding, and secured with a cohesive outer layer.
Used to reduce swelling, these must be applied with consistent, even pressure. Improper compression can quickly become dangerous. If your dog has a ligament injury, chronic instability, or a history of knee problems, a structured brace—not a simple wrap—may be more appropriate. Wraps are typically temporary solutions rather than long-term support systems.
Correct application is critical. A poorly wrapped leg can restrict circulation, increase swelling, or create pressure sores.
Before wrapping an injured leg, confirm the diagnosis. A wrap may be helpful for a mild strain—but not for a fracture, ligament tear, or dislocation.
You’ll typically need:
If there’s a wound, gently clean it as instructed by your veterinarian and apply a sterile dressing.
Begin at the lowest part of the limb and wrap upward with even, overlapping layers (about 50% overlap per turn). Wrapping upward supports circulation.
The wrap should be snug—but not tight. A good rule of thumb: you should be able to comfortably slide two fingers between the wrap and your dog’s leg.
Use the wrap’s self-adhesive property or medical tape. Avoid pulling too tightly at the end.
After wrapping, look at your dog’s toes:
If anything looks abnormal, remove the wrap immediately.
Check the wrap at least twice daily. Remove and reapply if it becomes wet, dirty, loose, or starts to slip.
Even experienced dog owners can make wrapping errors. Watch out for these:
Wraps are supportive tools—not standalone treatments.
There are times when wrapping is not appropriate.
Seek veterinary care immediately if your dog has:
If your dog’s condition doesn’t improve within a day or two—or worsens—professional evaluation is necessary.
It’s important to understand that wraps provide temporary, mild support. They are helpful for:
They are not designed to:
For dogs dealing with significant knee instability, chronic ligament injuries, or recurring joint problems, a more structured support solution may be required. A wrap alone won’t prevent mechanical instability from progressing.
Dog leg wraps can be incredibly useful when used thoughtfully and correctly. They can protect wounds, reduce mild swelling, and provide short-term comfort. However, they must be applied carefully, monitored consistently, and used for the right reasons.
When in doubt, consult your veterinarian before wrapping an injured limb. The right guidance ensures your dog gets relief—without unintended complications.
Used properly, a simple wrap can support healing and comfort. Used incorrectly, it can delay recovery. The difference lies in understanding when, why, and how to use one.
For more information you can contact us via our contact form or visit us on Facebook.
Articles from the Posh Dog Knee Brace team — a group effort with our licensed veterinary technicians and brace specialists, sharing 15+ years of experience helping dogs recover from CCL/ACL injuries and mobility challenges.
As dog owners, we cherish every adventure with our furry companions—from a playful romp in the park to a quiet stroll down the street. But no matter how vigilant we are, minor accidents and injuries are an unfortunate, inevitable part of a dog’s active life. A sudden yelp, a limp, or a patch of blood can send any pet parent into a panic.
While major emergencies always warrant immediate veterinary attention, knowing how to administer basic first aid for minor injuries can make a world of difference. It can prevent a small problem from escalating, alleviate your dog’s pain, and even save you a frantic late-night trip to the emergency vet. More importantly, being prepared helps you stay calm and act effectively when your dog needs you most.
This guide will walk you through essential first aid steps for common minor injuries, helping you to confidently provide immediate care for your best friend.
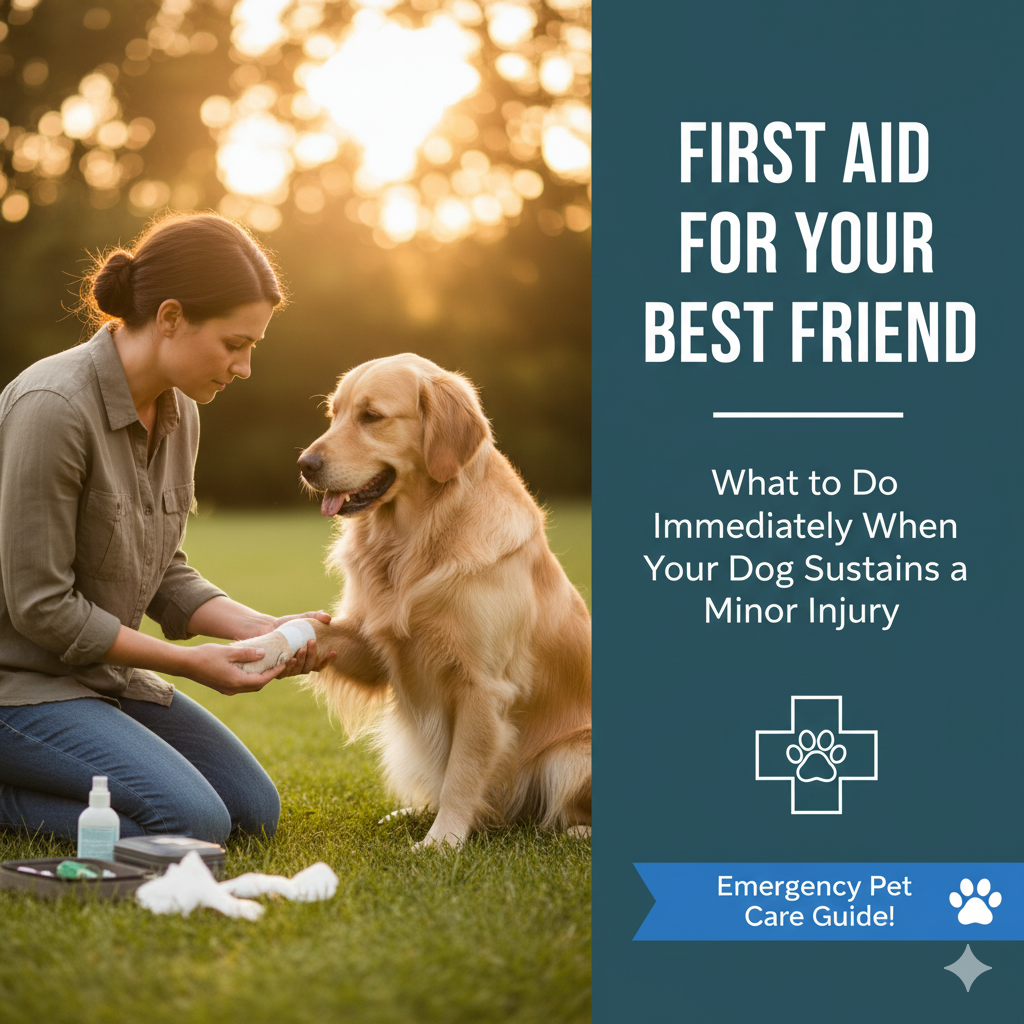
Your dog feeds off your energy. If you’re panicking, they’re more likely to be stressed, making treatment more difficult and potentially worsening the situation. Take a deep breath, assess the situation, and act methodically.
Before any injury strikes, assemble a dedicated pet first aid kit. Keep it accessible at home and consider a smaller version for your car or travel bag.
1. Cuts, Scrapes, and Lacerations
2. Paw Pad Injuries (Cuts, Punctures, Burns)
3. Limping or Sprains (Without Obvious Bone Fracture)
4. Minor Burns (Chemical or Thermal)
5. Insect Stings/Bites
This is paramount. While first aid can stabilize minor issues, it is never a substitute for professional veterinary care. Always seek immediate veterinary attention if:
Being prepared with a first aid kit and a basic understanding of how to respond can make all the difference in a stressful situation. You are your dog’s first line of defense, and with a calm mind and quick action, you can help them on the path to recovery.
For more information you can contact us via our contact form or visit us on Facebook.
Articles from the Posh Dog Knee Brace team — a group effort with our licensed veterinary technicians and brace specialists, sharing 15+ years of experience helping dogs recover from CCL/ACL injuries and mobility challenges.
Our dogs are built for running, jumping, and exploring the world with boundless energy. Their knees, though seemingly simple, are complex joints that bear a significant amount of stress. Understanding the basic anatomy of your dog’s knee and the common injuries that can occur is crucial for recognizing potential problems and appreciating how supportive measures like a knee brace can play a vital role in their well-being.

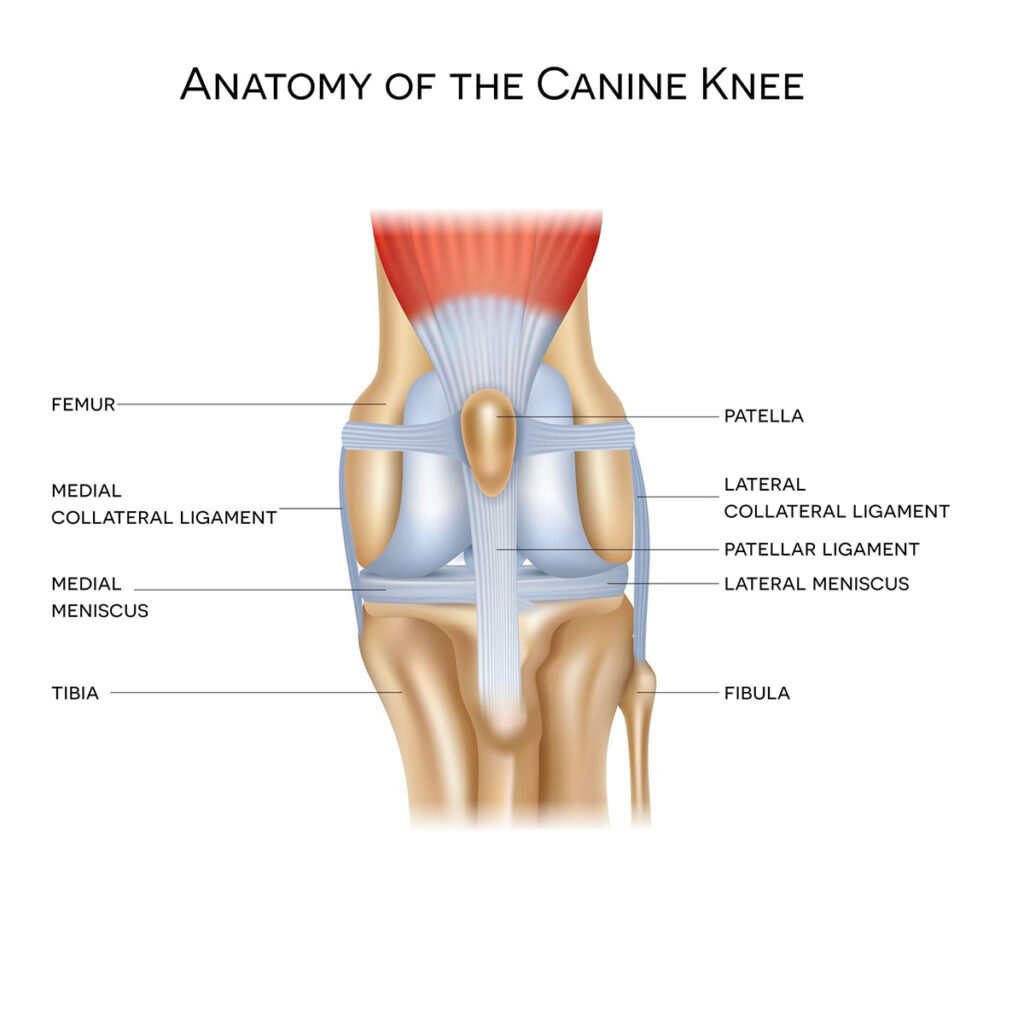
The canine stifle joint, which is analogous to the human knee, is a complex hinge joint responsible for flexion (bending) and extension (straightening) of the hind limb. It’s formed by the articulation of three main bones:
Several crucial soft tissues provide stability and enable smooth movement within the stifle joint:
Given the complexity and the forces it endures, the canine knee is susceptible to various injuries. Understanding these common issues highlights why external support like a knee brace can be so beneficial:
In the face of these common knee injuries, a canine knee brace can provide crucial support and aid in both conservative management and post-surgical recovery:
Important Note: While a knee brace can offer significant benefits, it’s not a substitute for proper veterinary care. Accurate diagnosis and a comprehensive treatment plan, which may include surgery, medication, and physical therapy, are essential. A knee brace should always be used under the guidance of your veterinarian or a veterinary rehabilitation specialist to ensure proper fit and application for your dog’s specific condition.
Understanding the intricate anatomy of your dog’s knee and the common injuries that can affect it highlights the importance of providing appropriate support when needed. A canine knee brace, when used correctly as part of a comprehensive treatment plan, can be a valuable tool in helping your furry friend recover from injury and maintain their mobility and quality of life.
For more information about our brace you can contact us at via our contact page or visit us on Facebook.
Articles from the Posh Dog Knee Brace team — a group effort with our licensed veterinary technicians and brace specialists, sharing 15+ years of experience helping dogs recover from CCL/ACL injuries and mobility challenges.
As the temperature drops and the winter wind picks up, us humans grab our heavy coats and turn up the heat. But for a dog recovering from a CCL injury or wearing a Posh Dog Knee Brace, a cold front means more than just a shiver—it can mean stiff joints and extra sensitivity.
Cold weather can cause muscles to tighten and joints to ache, making it even more important to stay diligent with your dog’s recovery routine. Here is how to keep your pup cozy and their brace-wear effective during a freeze.

Just like an athlete (or a lead guitarist!) needs to stretch before a set, your dog needs a “pre-game” warm-up when it’s cold. Before heading outside, encourage some light movement indoors.
The Posh Dog Knee Brace is built for durability, but cold air and moisture require a little extra attention:
Cold fronts often bring damp or icy surfaces. A dog in a knee brace is already working on their balance; a slippery porch or sidewalk is their worst enemy.
When it’s too cold to stay out long, focus on high-quality indoor rest.
During a cold front, “short and frequent” is better than one long excursion. Keep bathroom breaks quick and focused. The goal is to maintain mobility without letting the joint get chilled and stiff.
The Bottom Line: A cold front doesn’t have to stall your dog’s joint recovery. With the support of their Posh Dog Knee Brace and a little extra warmth from you, they’ll be ready to “rock” the backyard again in no time.
Stay warm, stay safe, and keep those tails wagging!
For more information contact us via our contact form or visit us on Facebook.
Articles from the Posh Dog Knee Brace team — a group effort with our licensed veterinary technicians and brace specialists, sharing 15+ years of experience helping dogs recover from CCL/ACL injuries and mobility challenges.
The day your veterinarian clears your dog for short, controlled leash walks after a significant injury or surgery—whether it’s a TPLO, TTA, fracture repair, or recovery from IVDD—feels like a huge victory. You’re finally moving forward!
But this seemingly simple activity is actually one of the riskiest phases of recovery. An uncontrolled tug, a sudden squirrel sighting, or a slip on the sidewalk can lead to a disastrous setback, potentially undoing weeks or months of careful healing.
Controlled leash walking is not just about letting your dog stretch their legs; it is a vital form of therapeutic exercise, integral to building proper gait, muscle strength, and confidence. This guide will provide you with the essential equipment, techniques, and mindset required to master the post-operative leash walk and ensure a smooth, successful recovery for your best friend.

Before you even step out the door, you must ensure you have the right tools to maintain absolute control and support your dog’s body.
1. The Right Leash and Collar/Harness
2. The Must-Have Support Sling
For dogs recovering from hind-leg surgery (like ACL repair) or struggling with severe weakness, a support sling is non-negotiable, particularly in the first 4-8 weeks.
3. Foot Protection (When Necessary)
If the weather is icy, snowy, or wet, or if your dog is prone to slipping on wet pavement, use protective, non-slip dog booties. A single slip can cause a major setback, especially if they are hesitant to put weight on the recovering leg.
The goal of a recovery walk is not socialization or exploration; it is controlled, straight-line, deliberate movement.
4. The “Slow and Straight” Mantra
5. Timing and Duration are Critical
6. Environmental Control: The Cone of Silence
The ultimate goal of the therapeutic walk is to get your dog to place the recovering limb down correctly and bear weight naturally.
7. Encourage Equal Weight Distribution
8. The Power of Consistency
9. Post-Walk Check-In
After every walk, take a moment to:
Mastering the post-operative leash walk requires patience, diligence, and a commitment to keeping your dog’s safety as the absolute priority. By controlling the environment, using the right support tools, and focusing on a slow, straight gait, you are actively participating in your dog’s healing, ensuring they not only recover but thrive. For more information about our brace contact us via our contact form or visit us on Facebook.
Articles from the Posh Dog Knee Brace team — a group effort with our licensed veterinary technicians and brace specialists, sharing 15+ years of experience helping dogs recover from CCL/ACL injuries and mobility challenges.