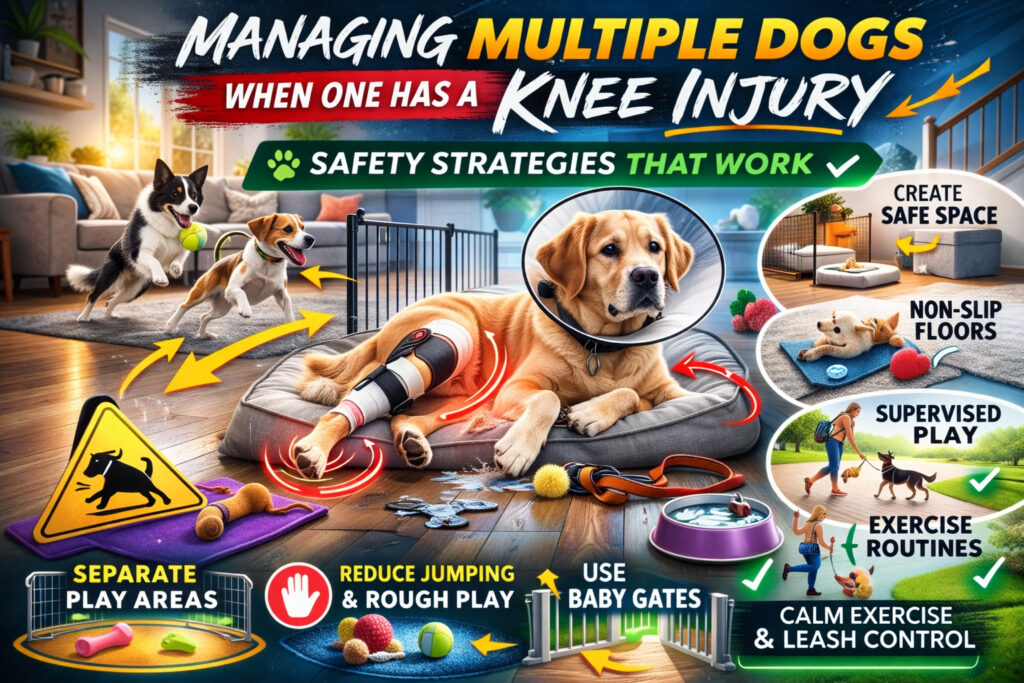
Managing Multiple Dogs When One Has a Knee Injury: Safety Strategies That Work
When you have more than one dog, life is usually full of movement—shared zoomies, backyard wrestling matches, synchronized barking at the mail carrier, and group excitement at the sound of car keys. But when one dog suffers a knee injury, everything changes.
Whether your dog has experienced a cranial cruciate ligament (CCL) tear (often referred to as an ACL injury), had surgery, or is being managed conservatively, your entire household routine needs adjustment. The challenge isn’t just protecting the injured knee—it’s managing energy, space, and interactions so healing can happen safely. If you’re navigating multi-dog life during recovery, here’s how to keep everyone safe and sane.
Understanding the Risk in Multi-Dog Homes
Dogs don’t operate on “light duty” naturally. They communicate and play physically. Even calm dogs can bump, chase, or initiate play without warning.
After common surgical repairs or bracing:
…controlled movement is essential for proper healing.
Unplanned wrestling or sudden chasing can:
Twist the healing knee
Damage surgical repair
Cause swelling and inflammation
Increase the risk of injuring the opposite knee
In multi-dog households, prevention requires structure—not just hope.
Strategy 1: Separate During Peak Energy Times
You don’t necessarily need to isolate your injured dog 24/7—but you must manage high-energy moments.
Common trigger times include:
Morning wake-up
When someone comes home
Feeding time
When leashes come out
Play sessions
Doorbell or delivery arrivals
During these times, use:
Baby gates
Crates
Exercise pens
Separate rooms
Posh Dog knee brace
Prevention is always easier than correcting excitement once it starts.
Strategy 2: Controlled Leash Use Indoors
It may feel excessive, but short-term indoor leash management can be extremely effective.
Keep your recovering dog on a lightweight leash indoors so you can:
Prevent sudden dashes
Redirect movement
Stop play attempts
Control transitions between spaces
Support the knee externally with a brace
If other dogs are excitable, leash them too during shared time. Calm coexistence is the goal—not total separation, but structured interaction.
Strategy 3: Eliminate Group Play
Even gentle play can escalate quickly.
During knee recovery:
No wrestling
No chasing
No tug-of-war
No fetch with multiple dogs
It only takes one pivot or collision to undo weeks of healing.
Instead, provide:
Individual enrichment sessions
Separate short walks
Mental stimulation games
Calm bonding time
Remember: Physical rest doesn’t mean emotional isolation.
Strategy 4: Protect Shared Outdoor Time
If you have a fenced yard, don’t assume it’s safe for unsupervised group turnout.
Options that work:
Rotate outdoor breaks
Use long leads for controlled movement
Create temporary fenced sections
Keep the injured dog on leash even in the yard
Backyard sprints are one of the biggest causes of reinjury. If your other dogs are high-drive breeds, this becomes even more important. Excitement spreads quickly in a group.
A crate or exercise pen provides structure and safety—especially in early post-op weeks.
The recovery zone isn’t punishment. It’s protection.
Strategy 7: Watch for Overcompensation Injuries
Here’s something many owners don’t realize:
Dogs who tear one CCL often injure the other within 1–2 years. Using a Posh Dog Knee Brace can significantly decrease this risk, sometimes by 70%.
In multi-dog households, overcompensation risk increases because:
The injured dog moves unpredictably
They shift weight unevenly
They may try to “keep up”
Protecting the healing leg also protects the opposite knee. Controlled, symmetrical movement is essential.
Strategy 8: Maintain Routine for the Other Dogs
One common mistake? Letting the entire household energy drop drastically.
Your healthy dogs still need:
Exercise
Stimulation
Structure
If they don’t get it, they’ll redirect that energy toward the recovering dog.
Schedule:
Separate walks
Solo fetch sessions
Training time
Puzzle toys
A tired dog is a calm dog—and calm dogs protect healing knees.
Strategy 9: Keep Greetings Calm
Multi-dog households tend to erupt when someone enters the home.
To manage this:
Place the injured dog behind a gate before entering.
Greet high-energy dogs first.
Wait for calm behavior.
Then allow controlled interaction.
Excited pack greetings can involve jumping, circling, and bumping—all dangerous during recovery.
Calm entrances set the tone.
Strategy 10: Train “Settle” as a Group Skill
Recovery is a great time to reinforce impulse control.
Teach:
“Place” or “bed” command
Group down-stay
Calm duration holds
Eye contact for redirection
Structured training strengthens communication and lowers chaos.
Dogs thrive on clarity.
Strategy 11: Monitor Body Language Closely
Watch for:
Play bows
Raised hackles
Circling
Shoulder bumping
Fast tail wagging with stiffness
Intervene early.
Don’t wait for escalation.
If you see play energy building, separate before it turns physical.
Strategy 12: Supervision Is Non-Negotiable
Until your veterinarian clears full activity, assume that unsupervised time is unsafe.
Even bonded dogs can:
Accidentally collide
Initiate chase
Trip over one another
Short-term vigilance prevents long-term setbacks.
Strategy 13: Gradual Reintroduction After Recovery
When your veterinarian confirms healing progress, don’t immediately return to full-speed play.
Instead:
Start with leashed parallel walks
Allow calm sniffing sessions
Reintroduce short, supervised play
Watch for fatigue
Muscle strength takes time to rebuild—even after surgical repair.
Healing bone does not equal fully conditioned muscle.
Strategy 14: Manage Human Expectations
It’s easy to feel guilty separating dogs or limiting activity.
But remember: You are preventing reinjury. You are protecting thousands of dollars in surgery. You are avoiding prolonged pain.
Recovery is temporary. Chronic instability is not.
Strategy 15: Keep Recovery Emotionally Balanced
Dogs sense stress in the household.
Maintain:
Calm tone
Predictable schedule
Gentle affection
Structured routine
Your injured dog needs emotional stability as much as physical rest.
Isolation without interaction can increase anxiety, which leads to restless behavior.
Balance is key.
The Bigger Picture: Structure Creates Safety
Managing multiple dogs when one has a knee injury isn’t about isolating the injured dog from the family—it’s about controlling variables during healing.
Success comes from:
Preventing high-energy collisions
Structuring shared time
Rotating activities
Supporting calm behavior
Supervising consistently
Bracing the injured and overcompensated leg
Recovery from a CCL injury isn’t just medical—it’s environmental.
Your home becomes part of the treatment plan.
With intentional management, your injured dog can heal properly without creating chaos in the rest of your pack.
And when recovery is complete, your structured leadership may even leave your household calmer and more balanced than before. For more information about our Posh brace you can contact us via our contact form or visit us on Facebook.
Articles from the Posh Dog Knee Brace team — a group effort with our licensed veterinary technicians and brace specialists, sharing 15+ years of experience helping dogs recover from CCL/ACL injuries and mobility challenges.
Can Zoomies Cause an ACL Tear in Dogs? What Every Owner Should Know
If you’ve ever watched your dog suddenly bolt across the yard, spin in wild circles, and ricochet off the couch like a furry rocket — you’ve witnessed the legendary zoomies. Officially known as Frenetic Random Activity Periods (FRAPs), zoomies are completely normal and usually adorable.
But here’s the question many dog parents quietly worry about:
Can zoomies actually cause an ACL tear in dogs?
Let’s break down what really happens during those high-speed bursts — and what every owner should know to protect their pup’s knees.
First, What Is an ACL Tear in Dogs?
In dogs, the ligament we commonly call the “ACL” is technically known as the cranial cruciate ligament (CCL). It stabilizes the knee joint and prevents the shin bone from sliding forward.
When this ligament tears or ruptures, it causes:
Sudden limping
Difficulty bearing weight
Knee swelling
Trouble getting up or jumping
Sitting with one leg kicked out to the side
CCL tears are one of the most common orthopedic injuries in dogs.
So… Can Zoomies Actually Cause a Tear?
The short answer: Zoomies alone usually don’t cause a healthy ligament to tear.
However, zoomies can be the moment when a weakened or degenerating ligament finally gives out.
Here’s why:
1. Most CCL Tears Are Degenerative
Unlike human ACL injuries (which are often sudden sports injuries), dogs typically experience slow ligament degeneration over time. The ligament gradually weakens due to:
Genetics
Conformation (leg structure)
Weight
Chronic inflammation
Breed predisposition
By the time the ligament tears, it was often already compromised.
2. Zoomies Create Sudden Torque
During zoomies, dogs:
Accelerate quickly
Make sharp turns
Pivot hard on planted legs
Jump and twist mid-air
That sudden torque on a weakened knee can be the final straw. It’s not that zoomies are “dangerous” — it’s that they can expose an underlying issue.
Breeds at Higher Risk
Some breeds are more prone to CCL injuries, including:
Labrador Retrievers
Golden Retrievers
Rottweilers
Boxers
Pit Bulls
Newfoundlands
If you have one of these breeds, it’s especially important to monitor knee health.
Signs Your Dog’s Knee May Already Be Weak
Before a full tear, you might notice:
Occasional “skipping” or limping that improves
Stiffness after rest
Hesitation to jump
Slower sit-to-stand transitions
Mild swelling around the knee
These subtle signs often get dismissed — until a zoomie episode turns into a full rupture.
Does This Mean You Should Stop Zoomies?
Absolutely not.
Zoomies are:
A natural emotional release
A sign of happiness
A normal part of dog behavior
But there are smart ways to reduce injury risk.
How to Reduce the Risk of CCL Tears
🐾 1. Maintain Healthy Weight
Excess weight significantly increases strain on the knee joint.
🐾 2. Improve Traction
Slippery floors are a major risk factor. Consider:
Area rugs
Non-slip runners
Paw grip products
🐾 3. Strengthen Supporting Muscles
Strong thigh muscles help stabilize the knee and reduce ligament stress.
🐾 4. Manage High-Impact Surfaces
Hard, uneven terrain increases torque. Grass is generally safer than tile or polished concrete.
🐾 5. Provide Preventative Support
If your dog has shown early instability, structured joint support and stabilization can help protect the knee during activity.
The Other Knee Is at Risk Too
Here’s something many owners don’t realize:
When one CCL tears, the opposite knee has a high likelihood of tearing within 1–2 years.
Why?
Compensatory weight shifting
Underlying genetic or structural factors
Similar degeneration in the second ligament
Protecting the healthy leg becomes critical after the first injury.
When to Call the Vet
Seek veterinary evaluation immediately if:
Your dog won’t bear weight
The knee appears swollen
Pain is obvious
Limping lasts more than 24–48 hours
Early intervention can prevent further joint damage and arthritis progression.
The Bottom Line
Zoomies don’t create ACL (CCL) injuries out of nowhere.
But they can be the moment when a weakened ligament finally tears.
Instead of fearing zoomies, focus on:
Joint health
Muscle strength
Proper weight
Stable footing
Early signs of instability
That way, your dog can keep racing in joyful circles — safely.
If your dog has already experienced a CCL injury or you’re seeing early signs of instability, proactive knee support can make a significant difference in mobility and long-term joint protection.
Because every dog deserves to zoom — without the setback. 🐾 For more information about our brace you can contact us via our contact form or visit us on Facebook.
Articles from the Posh Dog Knee Brace team — a group effort with our licensed veterinary technicians and brace specialists, sharing 15+ years of experience helping dogs recover from CCL/ACL injuries and mobility challenges.
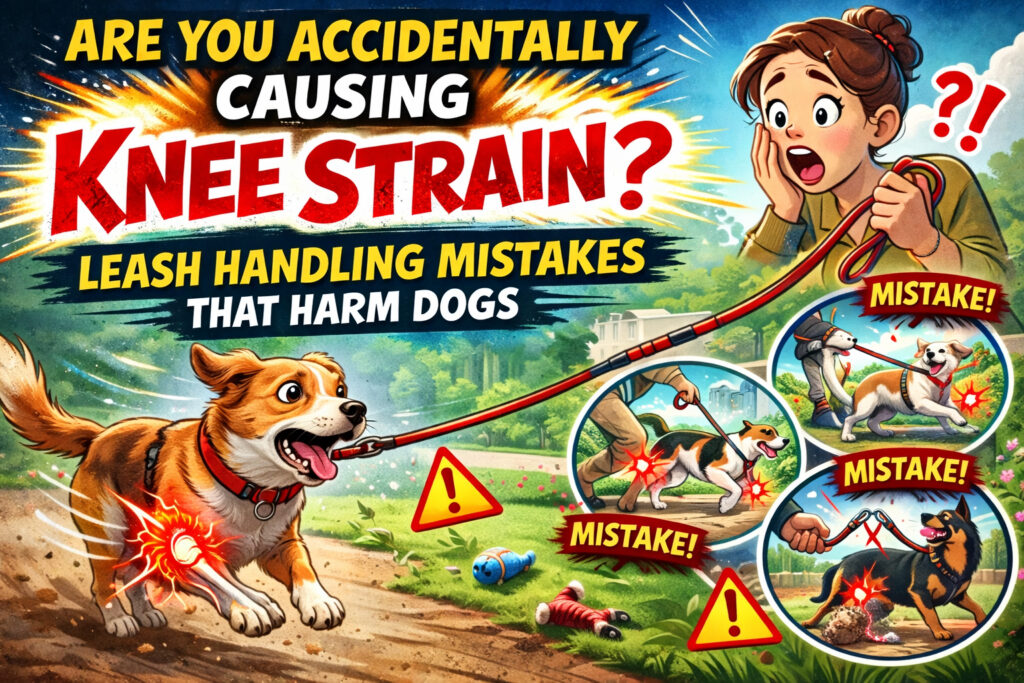
Are You Accidentally Causing Knee Strain? Leash Handling Mistakes That Harm Dogs
When we think about protecting our dogs’ knees, we usually picture slippery floors, rough play, or high-impact activities like jumping in and out of trucks. But what if one of the biggest contributors to knee strain is something you use every single day?
Your leash.
Leash walking seems simple. Clip it on. Head outside. Enjoy the stroll. But subtle leash handling mistakes can place repetitive strain on your dog’s knees—especially the stifle joint (the equivalent of the human knee). Over time, these small, daily forces can contribute to inflammation, soft tissue strain, and even ligament injuries.
If you’re committed to protecting your dog’s mobility and long-term joint health, this guide will help you spot and fix common leash mistakes that could be harming your dog without you even realizing it.
Understanding How the Canine Knee Works
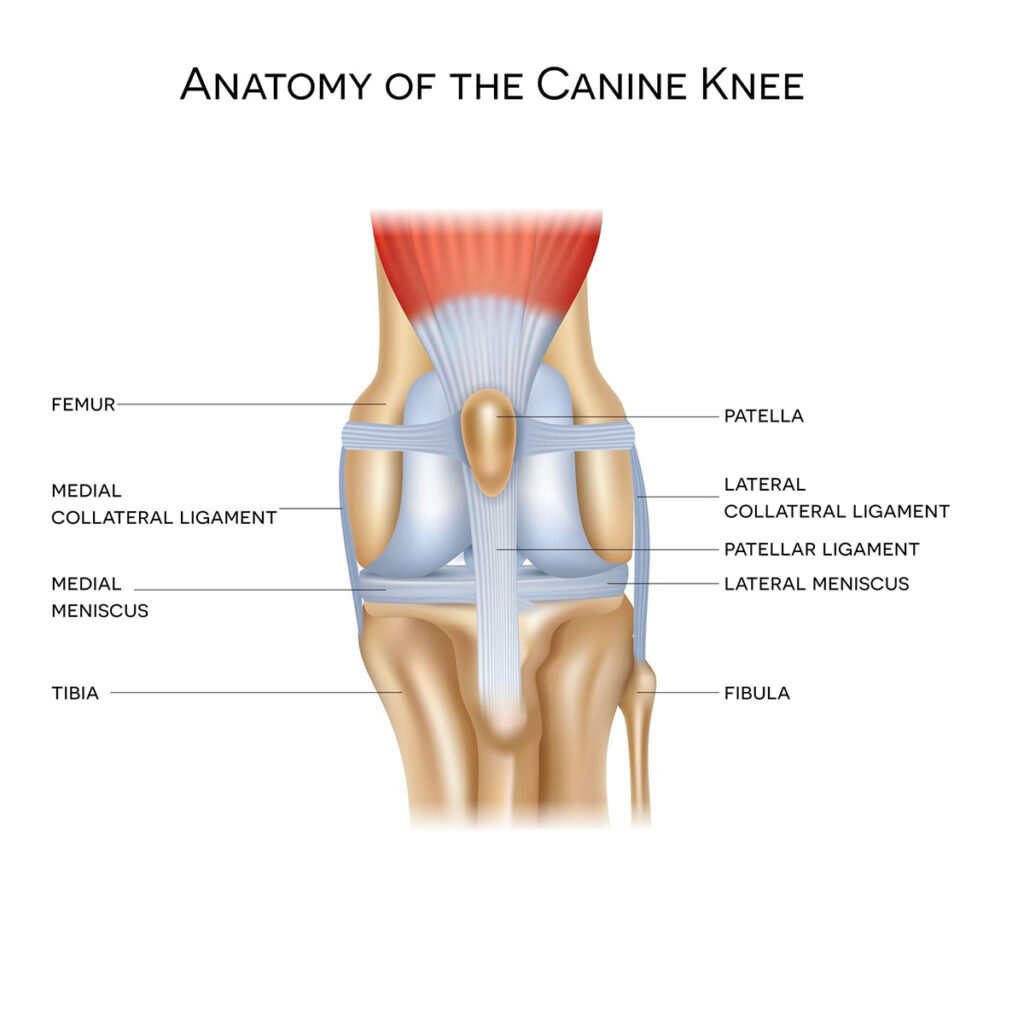
Before we talk about leash handling, it helps to understand what’s happening inside your dog’s leg.
The canine knee—called the stifle joint—relies heavily on soft tissues for stability, including the cranial cruciate ligament (CCL). Unlike humans, dogs carry about 60% of their body weight on their front limbs, but their rear legs generate powerful forward propulsion. When a leash interferes with natural movement patterns, the knees often absorb the consequences.
Sudden stops, lateral twisting, forced changes in direction, and constant pulling all create unnatural forces through the stifle joint. Over time, these repeated micro-stresses can add up.
Now let’s look at where leash handling plays a role.
Mistake #1: Constant Tension on the Leash
Even if your dog isn’t actively pulling, a constantly taut leash subtly alters their gait. Instead of moving naturally, your dog braces against forward pressure. This shifts weight distribution and increases joint loading—particularly in the knees and hips.
Why it matters:
Dogs may shorten their stride.
Rear legs may rotate slightly inward or outward.
The knee absorbs more shock during each step.
Over months or years, that repeated strain can contribute to chronic inflammation or ligament fatigue.
Fix it: Practice loose-leash walking where the leash forms a relaxed “J” shape. The goal isn’t rigidity—it’s fluid movement.
Mistake #2: Jerking or “Correcting” with Sudden Snaps
Quick leash corrections create sharp, abrupt force that travels through your dog’s body.
When you jerk a leash, your dog instinctively plants their feet to resist. That sudden bracing action often causes twisting forces through the knees. If this happens repeatedly, especially in high-energy dogs, it can increase wear on stabilizing ligaments.
Even if you’re not intentionally correcting, accidentally snapping the leash when distracted can have the same effect.
Fix it:
Use smooth, consistent guidance instead of abrupt corrections.
Anticipate distractions before your dog lunges.
Train with direction changes rather than force.
Your dog’s joints will thank you.
Mistake #3: Letting Your Dog Lunge Repeatedly
Excited lunging is one of the biggest contributors to knee strain.
When your dog lunges forward:
The front legs plant abruptly.
The body momentum continues forward.
The rear legs scramble to stabilize.
The knees absorb torque.
If your dog lunges toward squirrels, other dogs, delivery trucks, or people regularly, those explosive starts and stops can create significant joint stress.
Over time, that repeated force increases the risk of:
Soft tissue strain
Microtears in ligaments
Inflammation in the stifle joint
Fix it:
Work on impulse control training.
Increase mental stimulation before walks to reduce excess energy.
Use controlled direction changes rather than bracing against your dog’s pull.
Mistake #4: Using the Wrong Equipment for Your Dog’s Body Type
Certain equipment can amplify joint stress instead of reducing it—especially if it changes how your dog distributes weight.
For example:
Front-clip harnesses may cause unnatural lateral twisting if not fitted properly.
Retractable leashes can encourage sudden sprints followed by abrupt stops.
Very short leashes may force your dog into an unnatural gait.
If your dog already has mild joint instability, poor equipment choices can worsen compensation patterns.
Fix it:
Choose properly fitted equipment that supports natural alignment.
Avoid gear that encourages sprint-and-stop behavior.
Ensure harnesses don’t restrict shoulder or rear limb motion.
When in doubt, observe your dog walking from behind—are their hips swaying excessively? Are their knees rotating inward? Small alignment clues reveal big joint stress.
Mistake #5: Walking on Slippery Surfaces with Tension
Leash tension plus slippery surfaces is a dangerous combination.
If your dog slips slightly while the leash is taut, the stabilizing ligaments in the knee must work overtime to prevent a fall. That micro-instability, especially repeated over time, can increase strain on the CCL.
This is especially important in:
Polished concrete sidewalks
Wet pavement
Tile entryways
Boat docks
Fix it:
Keep the leash loose on slick surfaces.
Slow your pace.
Allow your dog to place their feet deliberately.
Controlled steps are safer steps.
Mistake #6: Overpowering Directional Changes
Some owners unconsciously “steer” their dogs by pulling them sideways.
But lateral pulling creates rotational torque through the stifle joint. Dogs aren’t designed to pivot sharply under external force. Sudden sideways redirection forces the knee to stabilize against unnatural angles.
Better approach: Instead of pulling sideways, use body positioning. Turn your own body first. Encourage your dog to follow naturally. This reduces joint torque and encourages healthier movement patterns.
These may indicate early joint stress or instability.
Addressing leash habits early can prevent more serious injuries later.
The Cumulative Effect of Micro-Strain
Here’s what many owners don’t realize:
It’s rarely one big event.
Knee injuries often result from repeated micro-trauma over time. Daily lunging. Constant pulling. Minor slips. Abrupt corrections. Over months, those small forces add up.
This is especially true in:
Active breeds
Overweight dogs
Dogs with mild conformation imbalances
Dogs recovering from previous injuries
Smart leash handling becomes part of preventive care—not just obedience training.
Building Knee-Friendly Walking Habits
Here’s a simple checklist you can use starting today:
✔ Keep leash slack whenever possible ✔ Avoid jerking or snapping corrections ✔ Reduce repetitive lunging ✔ Choose equipment that promotes natural movement ✔ Slow down on slippery surfaces ✔ Use body positioning instead of forceful steering ✔ Monitor subtle gait changes
These small adjustments dramatically reduce unnecessary joint stress.
When Extra Support Makes Sense
If your dog already shows signs of knee instability, mild CCL strain, or early joint weakness, modifying leash habits may not be enough.
External support during activity can:
Reduce excessive joint motion
Improve alignment
Minimize strain during walks
Provide confidence and stability
Especially during rehabilitation or prevention phases, supportive bracing can protect the joint while you improve training and handling habits.
Mobility protection isn’t just about recovery—it’s about prevention.
Your Daily Walk Should Build Strength—Not Cause Strain
Walks should:
Improve cardiovascular health
Build muscle support around the knee
Encourage controlled movement
Strengthen joint stability
But improper leash handling can quietly undermine all of that.
The good news? Small, intentional changes in how you handle the leash can dramatically reduce strain and protect your dog’s knees long-term.
Final Thoughts
You love your dog. You walk them to keep them healthy. You want them active and happy for years to come.
But even well-meaning habits can unintentionally place stress on sensitive joints.
By becoming aware of leash tension, lunging patterns, abrupt corrections, and equipment choices, you can transform daily walks from a hidden risk into a powerful tool for joint protection.
Protect the knees. Protect the zoomies. Protect the years ahead.
If you’re ever unsure whether your dog’s gait looks balanced or whether they may need additional support during activity, consult with your veterinarian and consider solutions designed specifically for canine knee stability.
Because mobility isn’t just about movement—it’s about freedom. For more information about our Posh brace contact us via our contact page or follow us on Facebook.
Articles from the Posh Dog Knee Brace team — a group effort with our licensed veterinary technicians and brace specialists, sharing 15+ years of experience helping dogs recover from CCL/ACL injuries and mobility challenges.
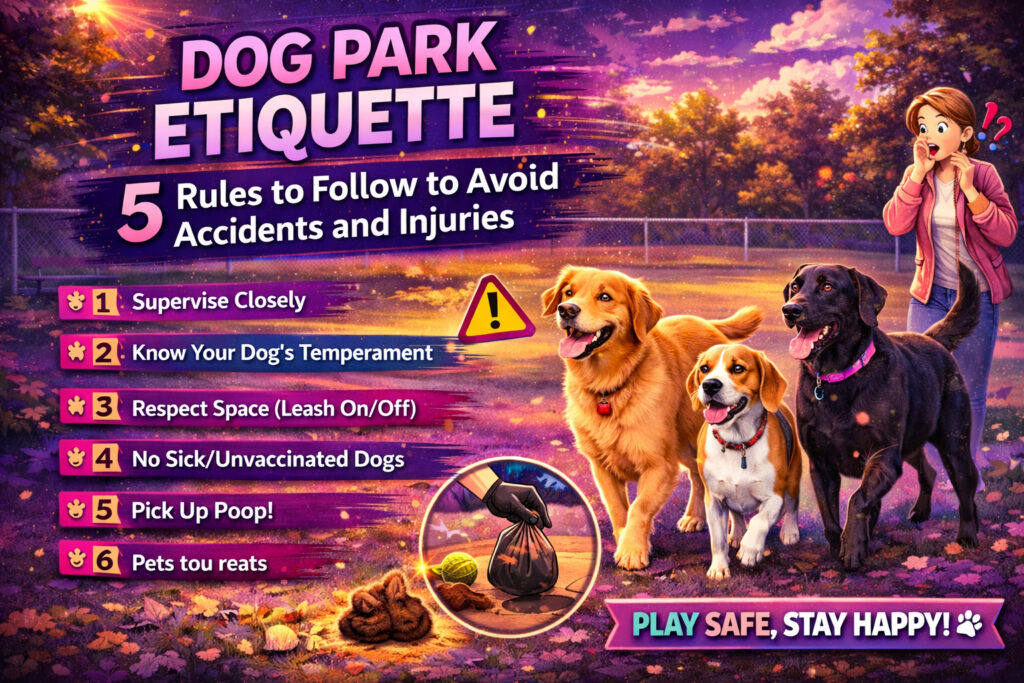
Dog Park Etiquette: 5 Rules to Follow to Avoid Accidents and Injuries
The dog park: a place of boundless energy, wagging tails, and the joyous freedom of off-leash play. For many dogs, it’s the highlight of their day—a chance to socialize, burn off energy, and revel in canine camaraderie. For owners, it’s an opportunity to watch their beloved pets thrive and connect with other dog enthusiasts.
However, the very freedom that makes dog parks so appealing can also make them unpredictable. Without proper etiquette and vigilance, a fun outing can quickly turn into a stressful experience, an argument, or, worse, an accident or injury. From minor scrapes to serious altercations or even the transmission of illness, the risks are real if everyone isn’t playing by the unwritten rules.
As owners of dogs, especially those prone to or recovering from joint issues, understanding and enforcing good dog park etiquette isn’t just about being polite; it’s about safety and responsibility. It’s about creating an environment where all dogs—and their humans—can enjoy themselves without unnecessary risks.
Here are 5 crucial rules to follow to ensure a safe, fun, and injury-free experience for everyone at the dog park.
Rule #1: Supervise Closely – You Are Your Dog’s Advocate for the Dog Park
This is the golden rule, the foundation of all other etiquette. Your phone call, podcast, or chat with a friend can wait. When your dog is off-leash in an unfamiliar environment with other dogs, your full attention is required.
Be Present: Scan the park constantly. Watch your dog and the dogs interacting with them. Look for subtle shifts in body language: a stiff tail, a hard stare, growls, yips, or a dog trying to get away.
Anticipate Trouble: Learn to read canine body language. A low growl, tucked tail, or persistent mounting could escalate quickly. Intervene before a fight starts, not after.
Active Engagement: Don’t just stand there. Move around, call your dog, praise good behavior, and gently interrupt undesirable interactions. This shows your dog you’re still in charge and available for guidance.
Why it Matters: A dog wrestling too roughly, a timid dog being cornered, or a small dog being overwhelmed by larger ones can lead to physical injury (sprains, strains, punctures) or lasting psychological trauma. Your intervention is their protection.
Rule #2: Know Your Dog’s Temperament and Limitations
Not every dog is a “dog park dog.” Understanding your dog’s personality and physical capabilities is paramount.
Temperament Check:
Is Your Dog Sociable? Do they genuinely enjoy interacting with a variety of dogs, or do they prefer their own company, a select few friends, or human interaction? A dog who is constantly retreating, hiding, growling, or snapping is stressed and not having fun.
Are They Overly Dominant or Aggressive? If your dog consistently tries to mount, pin, or harass other dogs, or shows any signs of aggression, the dog park is not the place for them. Consider parallel walks or controlled playdates instead.
Are They Resource Guarders? If your dog guards toys, food, or even you, avoid bringing those items (especially treats) into the park, as it can spark conflict.
Physical Limitations:
Puppies: Are they fully vaccinated? Over-exercising or rough play can damage developing joints.
Senior Dogs: Do they have arthritis or joint pain? The unpredictable nature of dog parks can lead to falls or collisions. A quiet, on-leash walk might be better.
Dogs in Recovery: If your dog is recovering from an injury (like a knee or hip issue), a dog park is generally a very high-risk environment. The uncontrolled movements, sudden stops, turns, and potential for collisions make it unsuitable until they are 100% cleared for vigorous, uncontrolled activity, if at all. Stick to controlled environments and specific rehabilitation exercises.
Why it Matters: Bringing an unsuitable dog to the park puts them and every other dog at risk. Injuries can range from simple sprains to severe ligament tears or bone fractures from rough play or collisions.
Rule #3: Respect Space & Leash On/Off Protocols at the Dog Park
The entryway and initial interactions are critical, and not all dogs are ready for off-leash play the moment they arrive.
Leash On Until Inside: Always keep your dog on a leash until you are fully inside the designated off-leash area and the gate is securely closed. This prevents dogs from rushing out or charging other dogs upon entry.
Avoid the “Greeting Gauntlet”: The gate area can become a high-tension zone with dogs excitedly greeting newcomers. If your dog is nervous, or if there’s a crowd, wait for the area to clear or use a separate entrance if available.
Know When to Leash Up (Temporarily):
If your dog is overly excited, rambunctious, or becoming a nuisance, leash them for a few minutes to allow them to calm down.
If you see another dog (or owner) who looks uncomfortable, proactively leash your dog.
If a dog is showing signs of fear or aggression, remove your dog from the situation.
No Leash in the Main Area (Generally): While temporary leashing to calm down is fine, keeping your dog on a leash for extended periods in the off-leash area can be problematic. A leashed dog can feel vulnerable or trapped, making them more prone to defensive reactions. It can also trip up other dogs.
Why it Matters: Poor introductions and inappropriate leash use are common triggers for fights and can result in bite injuries.
Rule #4: No Sick or Unvaccinated Dogs – Protect the Pack’s Health
The dog park is a communal space, and with that comes a shared responsibility for public health.
Full Vaccinations: Ensure your dog is fully vaccinated (including Bordetella/kennel cough, distemper, parvovirus, rabies, etc.) before visiting. Puppies, especially, should not be in dog parks until their full vaccination series is complete.
Parasite-Free: Your dog should be current on flea, tick, and heartworm prevention.
No Illnesses: If your dog is showing any signs of illness (coughing, sneezing, vomiting, diarrhea, lethargy, open wounds), keep them home! Even if it seems minor, it could be contagious.
Why it Matters: Dog parks are hotbeds for the transmission of contagious diseases and parasites. A single sick dog can infect many others, leading to widespread illness and vet bills.
Rule #5: Pick Up Your Poop! It’s Basic Decency & Health
This might seem obvious, but it’s astonishing how often it’s ignored.
Always Carry Bags: Bring more poop bags than you think you’ll need.
Immediate Clean-Up: Pick up your dog’s waste immediately and dispose of it in designated bins.
Why it Matters: Beyond being disgusting and disrespectful to other users, dog waste carries bacteria and parasites (like Giardia, roundworms, parvovirus) that can spread illness to other dogs and even humans. It’s a health hazard.
The Bottom Line: Responsible Dog Ownership
The dog park can be a wonderful resource for well-socialized, healthy dogs and attentive owners. By committing to these 5 essential rules of etiquette, you contribute to a safer, cleaner, and more enjoyable environment for every four-legged friend and their human companions. Prioritize safety, pay attention, and let’s make every dog park visit a positive experience!
At Posh Dog Knee Brace, we are committed to helping your pup stay active and safe; for more information about our bracing options, feel free to reach out via our contact form or join our community on Facebook.
Articles from the Posh Dog Knee Brace team — a group effort with our licensed veterinary technicians and brace specialists, sharing 15+ years of experience helping dogs recover from CCL/ACL injuries and mobility challenges.
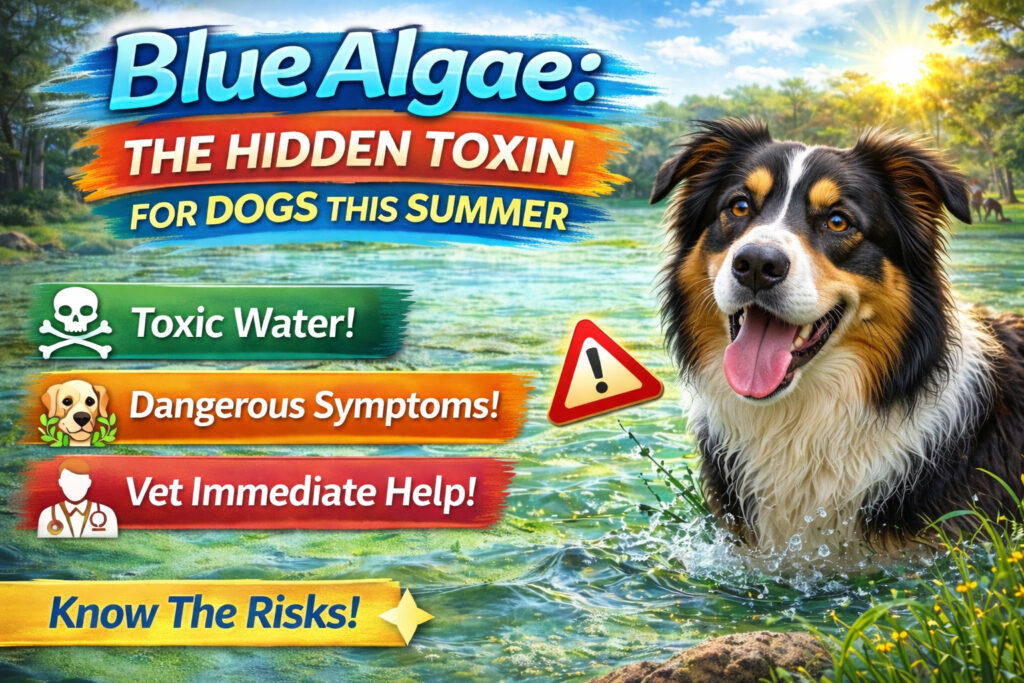
The Toxic Truth About Blue Algae Letting Your Dog Swim in Rivers or Lakes
Hi everyone! My name is Nikki, and I’m the Lead Veterinary Technician with Posh Dog Knee Braces. Today I want to talk about something extremely important for dog owners, especially during the warmer months when we all love getting outdoors with our pets. Swimming in rivers, lakes, and ponds can be a fun activity for both dogs and their humans, but there is a hidden danger that many pet owners are unaware of. That danger is something called blue-green algae, often simply referred to as blue algae.
This type of algae can be incredibly toxic and even deadly for dogs. Every summer, veterinary clinics see tragic cases involving dogs that were exposed to this toxin after swimming in or drinking from contaminated water. Unfortunately, many dog owners have never heard about this risk until it’s too late. My goal with this blog is to help educate you about blue algae, explain why it’s so dangerous, and give you some practical tips to help keep your dog safe while still enjoying summer adventures.
What Is Blue-Green Algae?
Blue-green algae is not actually algae in the traditional sense. It is a type of bacteria known as cyanobacteria that thrives in warm, nutrient-rich water. These bacteria can grow rapidly and form what are called algal blooms, which are dense layers that appear on the surface of water.
These blooms often occur in stagnant or slow-moving bodies of water, such as ponds, lakes, and certain areas of rivers. When conditions are right—typically warm temperatures, sunlight, and excess nutrients in the water—the bacteria multiply very quickly. This is why blooms are most commonly seen during the summer months, especially from July through August, although they can occur earlier or later depending on the climate.
One of the most dangerous things about blue-green algae is that it can produce powerful toxins that are extremely harmful to animals and humans. Dogs are particularly vulnerable because they often drink the water they swim in, and they may lick algae off their fur after leaving the water.
Why Blue Algae Is So Dangerous for Dogs
The toxins produced by blue-green algae attack the body very quickly. In many cases, symptoms begin appearing within minutes to hours after exposure. The toxins can affect several major organs, including the liver and nervous system, which is why poisoning from blue algae can progress rapidly and become life-threatening in a short amount of time.
Dogs that ingest contaminated water may experience symptoms such as:
Vomiting
Diarrhea
Weakness or lethargy
Excessive drooling
Difficulty breathing
Seizures
Disorientation or collapse
In severe cases, dogs may go into organ failure or cardiac arrest. Sadly, once symptoms progress, treatment options can be limited and outcomes are often poor.
Over the course of my veterinary career, I have personally witnessed dozens of beautiful dogs lost to this toxin, and it is absolutely heartbreaking every single time. Many of these families had no idea the water their dog swam in contained a deadly hazard.
Where Blue-Green Algae Is Most Common
Blue algae tends to develop in areas where water is warm, calm, and nutrient-rich. This means it often appears in places that might otherwise look peaceful and inviting.
Common locations include:
Ponds
Lakes
Slow-moving rivers
Reservoirs
Stagnant water sources
Areas with heavy algae or moss growth
Sometimes blooms appear as a green, blue-green, or even reddish film on the surface of the water. It may look like paint spilled across the top of the water, pea soup, or thick green scum. However, not all blooms are easy to recognize. Some may simply appear as cloudy or discolored water.
This is why it’s extremely important to avoid letting your dog swim in water that has visible algae or moss, unless you know the area is regularly tested and confirmed to be safe.
Even the most beautiful and remote lakes can contain toxic algae during certain times of the year. Just because the water looks clear or natural does not necessarily mean it is safe.
The Hidden Danger Close to Home
Many people assume this issue only happens in large lakes or natural bodies of water. Unfortunately, that is not always the case. Blue algae can develop almost anywhere that stagnant water collects, even in areas close to home.
I once worked with a family that had a small pug who tragically died after exposure to blue algae in their own backyard. The source of the contamination was something they had completely forgotten about—an old fish tank that had been left outside.
Over time, rainwater collected inside the tank, creating a small stagnant pool. Eventually, the conditions allowed blue algae to develop in the water. Their dog drank from it, and by the time the family realized something was wrong, it was already too late.
When the water was tested afterward, it came back positive for blue algae toxins.
This heartbreaking situation shows that dangerous algae blooms can occur in places we might never think to check. Any container, pond, or standing water source can potentially become a breeding ground under the right conditions.
How to Protect Your Dog
The good news is that with awareness and caution, many cases of blue algae poisoning can be prevented. Here are some simple but important steps you can take to protect your dog.
Avoid Water with Visible Algae
If you see green scum, mats of algae, or water that looks discolored or thick, do not allow your dog to swim or drink from it.
Check Local Water Advisories
Many parks and local authorities test popular lakes and swimming areas during the summer months. If a harmful algae bloom is detected, warnings are usually posted.
Bring Fresh Water for Your Dog
When hiking or visiting lakes and rivers, always bring clean drinking water for your dog. This reduces the chance they will drink from natural water sources.
Rinse Your Dog After Swimming
If your dog swims in natural water, rinse them with fresh water afterward. This helps remove any algae that might be stuck in their fur and prevents them from licking it off.
Keep an Eye on Standing Water
Check your yard for items that may collect rainwater, such as buckets, containers, old tanks, kiddie pools, or clogged gutters. Empty these regularly to prevent stagnant water from forming.
What to Do If You Suspect Exposure
If you believe your dog may have been exposed to blue algae, seek veterinary care immediately. Time is extremely critical in these situations.
Even if your dog only drank a small amount of water, it is better to err on the side of caution. Early treatment may improve the chances of survival.
Try to prevent your dog from licking their fur and, if possible, rinse them with clean water while heading to the veterinarian.
Enjoy Summer Safely
Summer adventures with your dog are some of the best memories we can make. Whether it’s hiking, camping, or swimming, spending time outdoors is wonderful for both you and your pet.
However, awareness of potential dangers like blue algae can make all the difference. Taking a few extra precautions can help ensure your dog stays safe while still enjoying the water.
Swimming can absolutely still be a fun activity—just make sure the area is safe and monitored. Avoid stagnant water with visible algae, stay informed about local conditions, and always keep fresh water available for your dog.
A Final Thought
As a veterinary technician, I have seen firsthand how devastating blue algae poisoning can be for families. Losing a beloved pet is never easy, and it is especially heartbreaking when it happens so suddenly.
The purpose of sharing this information isn’t to scare anyone away from outdoor fun—it’s simply to help spread awareness. Many dog owners have never heard of blue algae until tragedy strikes.
If this blog helps even one person avoid that situation and keep their dog safe, then it is worth sharing.
So this summer, enjoy the sunshine, the lakes, and the adventures with your furry companions—but remember to play it safe and stay aware of your surroundings.
Your dog is counting on you.
Stay safe out there! 🐾
For more information about any of our products please contact us via our contact form or visit us on Facebook.
— Nikki Lead Veterinary Technician Posh Dog Knee Braces
Articles from the Posh Dog Knee Brace team — a group effort with our licensed veterinary technicians and brace specialists, sharing 15+ years of experience helping dogs recover from CCL/ACL injuries and mobility challenges.
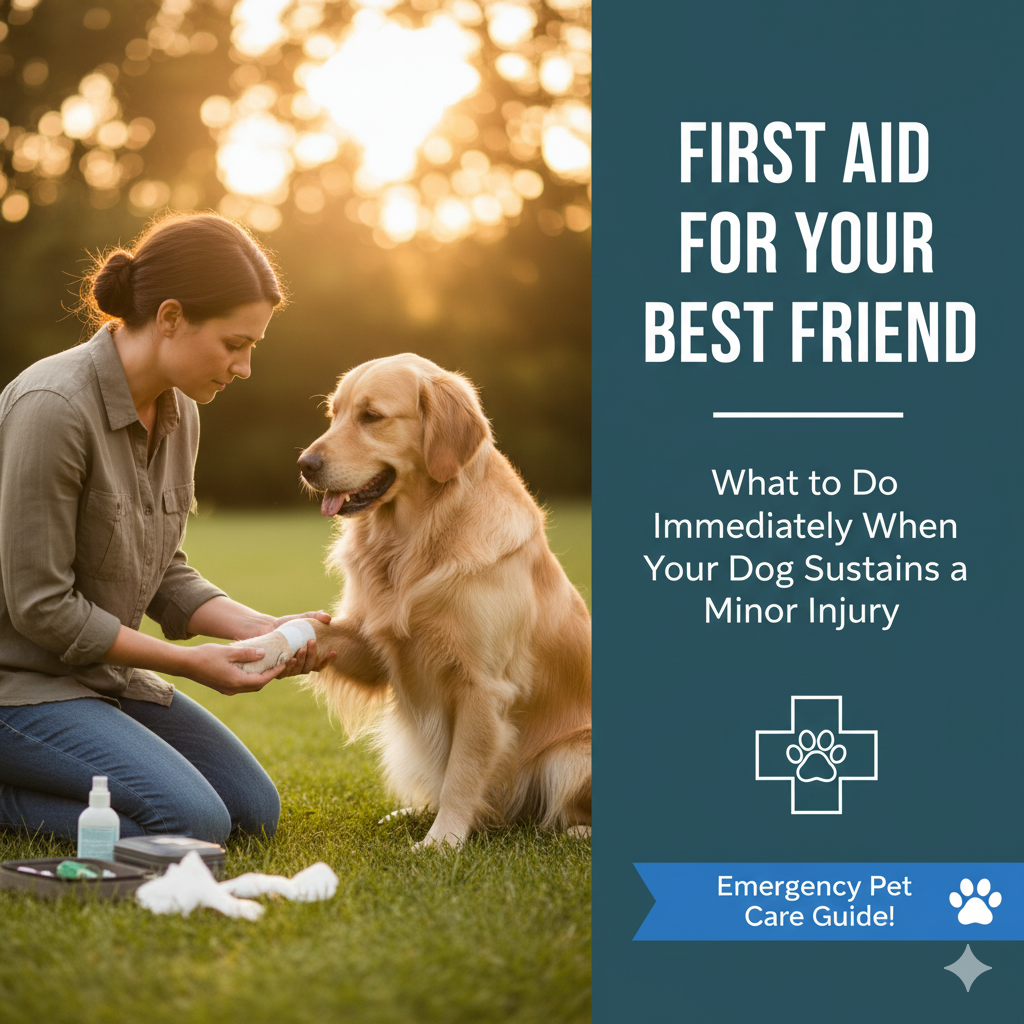
First Aid for Your Best Friend: What to Do Immediately When Your Dog Sustains a Minor Injury
As dog owners, we cherish every adventure with our furry companions—from a playful romp in the park to a quiet stroll down the street. But no matter how vigilant we are, minor accidents and injuries are an unfortunate, inevitable part of a dog’s active life. A sudden yelp, a limp, or a patch of blood can send any pet parent into a panic.
While major emergencies always warrant immediate veterinary attention, knowing how to administer basic first aid for minor injuries can make a world of difference. It can prevent a small problem from escalating, alleviate your dog’s pain, and even save you a frantic late-night trip to the emergency vet. More importantly, being prepared helps you stay calm and act effectively when your dog needs you most.
This guide will walk you through essential first aid steps for common minor injuries, helping you to confidently provide immediate care for your best friend.
The Golden Rule of Canine First Aid: Stay Calm!
Your dog feeds off your energy. If you’re panicking, they’re more likely to be stressed, making treatment more difficult and potentially worsening the situation. Take a deep breath, assess the situation, and act methodically.
Essential First Aid Kit Components for Your Dog
Before any injury strikes, assemble a dedicated pet first aid kit. Keep it accessible at home and consider a smaller version for your car or travel bag.
Sterile Gauze Pads & Rolls: For cleaning and bandaging wounds.
Adhesive Tape (Vet Wrap): Self-adhering bandage that won’t stick to fur.
Antiseptic Wipes/Solution: Betadine (povidone-iodine) or chlorhexidine wipes/solution (diluted as per instructions) to clean wounds. Avoid hydrogen peroxide, which can damage tissue.
Blunt-Tip Scissors: For cutting bandages or carefully trimming fur around wounds.
Tweezers: For removing splinters, thorns, or ticks.
Non-Stick Pads: For covering wounds.
Conforming Bandage: To hold pads in place.
Cotton Balls/Swabs: For applying antiseptics.
Digital Thermometer (Rectal or Ear): To check for fever (normal temp: 101-102.5°F).
Disposable Gloves: For hygiene.
Muzzle:Crucial for safety. Even the sweetest dog can bite when in pain or fear. A basket muzzle is ideal as it allows panting.
Old Towels/Blankets: For comfort, warmth, or makeshift slings.
Bottle of Saline Solution: For flushing wounds or eyes.
Styptic Powder/Pencil: To stop bleeding from minor nail cuts.
Petroleum Jelly: To help prevent wounds from sticking to bandages.
Emergency Vet Contact Info: Always readily available!
Common Minor Injuries and How to Respond
1. Cuts, Scrapes, and Lacerations
Assess: Is it deep? Is it bleeding profusely? Is there debris embedded?
Muzzle First: Always muzzle your dog before approaching an injury, especially if it’s painful.
Control Bleeding: Apply direct pressure with a clean gauze pad or cloth for 5-10 minutes. If blood soaks through, add more layers without lifting the original pad.
Clean the Wound: Once bleeding is controlled, gently flush the wound with saline solution or diluted antiseptic (chlorhexidine or Betadine). Carefully trim fur around the wound if necessary to keep it clean, using blunt-tip scissors.
Apply Ointment & Bandage: Apply a small amount of antibiotic ointment (like Neosporin, but only if approved by your vet as some human products are toxic if ingested) to a non-stick pad. Cover the wound, then wrap it with gauze and secure with Vet Wrap. Ensure the bandage isn’t too tight (you should be able to slip two fingers underneath).
When to See a Vet: Any deep cut, one that bleeds excessively, or if you suspect embedded foreign objects. Puncture wounds (from bites) always need vet attention due to infection risk.
2. Paw Pad Injuries (Cuts, Punctures, Burns)
Assess: Paw pads are tough but vulnerable. Check for cuts, punctures, foreign objects (glass, thorns), or redness/blisters from burns.
Muzzle & Clean: Muzzle your dog. If there’s a foreign object, try to remove it carefully with tweezers. Flush the area with saline.
Treat: For minor cuts, apply pressure to stop bleeding (paw pads bleed a lot!). Clean and apply antiseptic. For burns, cool the area with cool (not ice cold) water.
Bandage: Apply a non-stick pad, gauze between the toes (to prevent rubbing), and then wrap the paw, making sure the bandage is secure but not constricting.
When to See a Vet: Deep punctures, anything that won’t stop bleeding, severe burns, or if your dog can’t bear weight.
3. Limping or Sprains (Without Obvious Bone Fracture)
Assess: Does your dog refuse to put weight on a leg? Is there swelling, heat, or obvious deformity?
Restrict Movement: Immediately limit your dog’s activity. Confine them to a small area or crate.
Apply Cold Pack: For acute injuries (within 24-48 hours), apply a cold pack (ice wrapped in a towel) for 10-15 minutes, 2-3 times a day, to reduce swelling.
When to See a Vet: If the limping is severe, persists for more than a few hours, if there’s swelling, heat, or you suspect a fracture. Better safe than sorry with joint and bone health.
4. Minor Burns (Chemical or Thermal)
Assess: Look for singed fur, redness, blisters, or pain in the affected area.
Flush & Cool: Immediately flush the burn with cool (not cold) running water for 10-15 minutes. This stops the burning process and helps reduce pain.
Protect: Gently cover the cooled burn with a non-stick sterile bandage.
When to See a Vet:All burns should be evaluated by a vet to prevent infection and assess severity.
5. Insect Stings/Bites
Assess: Look for swelling, redness, or a visible stinger (bee stings typically leave them).
Remove Stinger: If you see a stinger, scrape it out with a credit card edge (don’t use tweezers as it can inject more venom).
Apply Cold Pack: Apply a cold pack to reduce swelling and pain.
Monitor: Watch for signs of an allergic reaction: severe swelling of the face/muzzle, hives, difficulty breathing, vomiting, weakness.
When to See a Vet: If your dog shows any signs of allergic reaction, is stung multiple times, or is stung in the mouth/throat.
Knowing When to Go to the Vet
This is paramount. While first aid can stabilize minor issues, it is never a substitute for professional veterinary care. Always seek immediate veterinary attention if:
Bleeding doesn’t stop after 10-15 minutes of direct pressure.
The wound is deep, large, or gaping.
You suspect a fracture, dislocation, or internal injury.
Your dog is in severe pain, lethargic, or showing signs of shock (pale gums, rapid shallow breathing).
There’s a foreign object embedded that you cannot easily remove.
Your dog has difficulty breathing, severe swelling (especially around the face/throat), or hives.
The injury involves the eye.
Being prepared with a first aid kit and a basic understanding of how to respond can make all the difference in a stressful situation. You are your dog’s first line of defense, and with a calm mind and quick action, you can help them on the path to recovery.
For more information you can contact us via our contact form or visit us on Facebook.
Articles from the Posh Dog Knee Brace team — a group effort with our licensed veterinary technicians and brace specialists, sharing 15+ years of experience helping dogs recover from CCL/ACL injuries and mobility challenges.
Mastering the Leash: How to Walk Your Dog Safely After Injury or Surgery
The day your veterinarian clears your dog for short, controlled leash walks after a significant injury or surgery—whether it’s a TPLO, TTA, fracture repair, or recovery from IVDD—feels like a huge victory. You’re finally moving forward!
But this seemingly simple activity is actually one of the riskiest phases of recovery. An uncontrolled tug, a sudden squirrel sighting, or a slip on the sidewalk can lead to a disastrous setback, potentially undoing weeks or months of careful healing.
Controlled leash walking is not just about letting your dog stretch their legs; it is a vital form of therapeutic exercise, integral to building proper gait, muscle strength, and confidence. This guide will provide you with the essential equipment, techniques, and mindset required to master the post-operative leash walk and ensure a smooth, successful recovery for your best friend.
Phase 1: Preparation and Essential Equipment
Before you even step out the door, you must ensure you have the right tools to maintain absolute control and support your dog’s body.
1. The Right Leash and Collar/Harness
Avoid Retractable Leashes: Retractable leashes are the enemy of recovery. They offer zero control, encourage pulling, and can lead to dangerous sudden lunges. Use a fixed-length, sturdy 4-to-6-foot leash.
Harness vs. Collar: For most orthopedic surgeries (especially knee or hip), a well-fitting chest harness is superior to a neck collar. A harness distributes pressure across the chest, preventing any sudden jolt on the neck that could translate down the spine and affect the limb or surgical site. Ensure the harness does not rub the incision.
2. The Must-Have Support Sling
For dogs recovering from hind-leg surgery (like ACL repair) or struggling with severe weakness, a support sling is non-negotiable, particularly in the first 4-8 weeks.
Types: This can range from a simple towel folded under their belly to a dedicated rehabilitation sling or dog lift harness with handles.
Purpose: The sling acts as a ‘seatbelt.’ It allows you to quickly and easily take some weight off the injured leg, preventing sudden weight-bearing if the dog stumbles, loses balance, or tries to jump. Keep the sling in your hands throughout the entire walk.
3. Foot Protection (When Necessary)
If the weather is icy, snowy, or wet, or if your dog is prone to slipping on wet pavement, use protective, non-slip dog booties. A single slip can cause a major setback, especially if they are hesitant to put weight on the recovering leg.
Phase 2: Mastering the Technique and Environment with a Leash
The goal of a recovery walk is not socialization or exploration; it is controlled, straight-line, deliberate movement.
4. The “Slow and Straight” Mantra
Pacing: The pace should be slow and consistent. Rushing encourages a chaotic gait and poor limb use. Slow walking forces the dog to place the foot down properly and use the muscles supporting the joint.
No Sharp Turns: Sharp pivots and turns twist the recovering joint, putting dangerous stress on healing tissue. When you need to turn, make a wide, slow, gradual arc. If space is tight, stop, turn the dog in place while supporting them with the sling, and then continue.
Straight Line: Stick to straight paths as much as possible. Sidewalks are usually better than meandering park trails.
5. Timing and Duration are Critical
Follow Vet’s Orders Exactly: Your vet or certified rehabilitation specialist will prescribe a specific duration (e.g., “5 minutes, 3 times a day”). Do not exceed this time, even if your dog seems eager for more. Fatigue leads to sloppy form, which can cause injury.
Quality over Quantity: A perfect 5-minute walk where the dog is using the limb well is infinitely better than a chaotic 20-minute walk where they are pulling and stumbling.
Avoid Fatigue: Always end the walk before your dog shows signs of fatigue (e.g., increased limping, lagging, heavy panting).
6. Environmental Control: The Cone of Silence
Choose Calm Times: Walk during off-peak hours when you are least likely to encounter other dogs, children, or major distractions. A sudden rush toward another dog could be catastrophic for a recovering limb.
Be a Barrier: If a distraction appears, physically block your dog and use high-value treats to gain their focus, moving them away from the stimulus immediately. You must be hyper-vigilant and ready to intervene instantly.
Surfaces: Stick to flat, predictable, non-slip surfaces. Avoid stairs, steep hills, sand, gravel, and wet leaves early in the recovery phase. Even surfaces are best.
Phase 3: Focusing on Gait and Weight-Bearing
The ultimate goal of the therapeutic walk is to get your dog to place the recovering limb down correctly and bear weight naturally.
7. Encourage Equal Weight Distribution
Observe: Watch your dog’s feet. Are they consistently “toe-touching” (just skimming the ground) or are they actively loading the limb?
Tactical Support: If your dog is consistently holding the limb up, gently use the support sling to lift their non-injured leg slightly. This forces the dog to place the recovering leg down to maintain balance. As soon as they place it down, immediately lower the sling. Do this repeatedly and gently until they start trying to use the recovering leg on their own.
8. The Power of Consistency
Routine: Maintain a consistent walking schedule. The body responds best to predictable, routine input.
Verbal Cues: Use calming, consistent verbal cues like “slow” or “easy” to keep your dog focused on you and the pace.
9. Post-Walk Check-In
After every walk, take a moment to:
Check the Incision: Look for any new redness, swelling, heat, or discharge around the surgical site.
Check the Paw Pad: Ensure they haven’t rubbed or irritated the paw on the recovering limb due to unusual gait or excessive dragging.
Monitor for Pain: Look for signs of increased lameness an hour after the walk or the next morning. If lameness is significantly worse, you need to reduce the walk duration and consult your vet/rehab specialist.
Mastering the post-operative leash walk requires patience, diligence, and a commitment to keeping your dog’s safety as the absolute priority. By controlling the environment, using the right support tools, and focusing on a slow, straight gait, you are actively participating in your dog’s healing, ensuring they not only recover but thrive. For more information about our brace contact us via our contact form or visit us on Facebook.
Articles from the Posh Dog Knee Brace team — a group effort with our licensed veterinary technicians and brace specialists, sharing 15+ years of experience helping dogs recover from CCL/ACL injuries and mobility challenges.
Hydrotherapy and Dogs: How Water Workouts Can Speed Up Joint Healing
As a dedicated dog owner, witnessing your beloved companion struggle with mobility—whether from a recent injury, surgery, or chronic conditions like arthritis—can be heartbreaking. While rest and medication are often the first lines of defense, a powerful, gentle, and highly effective tool is rapidly gaining popularity in veterinary medicine: hydrotherapy.
It might sound like a spa treatment, but hydrotherapy is a rigorous, controlled form of exercise performed in water. It’s often prescribed for post-operative recovery, managing chronic joint pain, and improving overall fitness, all while minimizing stress on vulnerable joints.
Here is why hydrotherapy is a game-changer for joint healing and mobility in dogs.
Why Water is the Ultimate Recovery Tool
The secret to hydrotherapy’s effectiveness lies in the unique properties of water: buoyancy, resistance, and warmth.
1. Buoyancy Reduces Impact 🌊
The most significant benefit of water is buoyancy. When a dog is submerged, the water supports a significant portion of their body weight.
The Science: This reduction in gravity allows dogs to move their limbs through a full range of motion without the painful, jarring impact that happens on land. For a dog recovering from ACL/cruciate ligament surgery or struggling with arthritis, this means they can begin rebuilding muscle strength much earlier in the recovery process.
2. Resistance Builds Muscle Safely 💪
While buoyancy relieves pressure, water simultaneously provides gentle, consistent resistance in all directions.
The Benefit: As the dog walks or swims, they are pushing against the water, which strengthens muscles surrounding the injured joint (like the knee or hip) without overexertion. This builds the crucial muscle support needed to stabilize the joint and prevent future injuries.
3. Warmth Soothes and Relaxes 🌡️
Most canine hydrotherapy takes place in heated water. This warmth is essential for the healing process.
The Result: Warm water increases circulation to the muscles, which helps deliver oxygen and nutrients to the injured area. It also soothes aching muscles and reduces joint stiffness, making movement easier and more comfortable for the dog.
Types of Canine Hydrotherapy
There are two primary ways dogs engage in water-based rehabilitation:
Hydrotherapy Method
Description & Benefits
Underwater Treadmill
The dog walks on a treadmill housed inside a tank of water. This is highly controlled: the water level and speed can be precisely adjusted to target specific gaits and muscle groups. It’s ideal for rebuilding a normal walking pattern post-surgery.
Swimming or Pool Work
The dog wears a safety vest and swims in a small pool. This is excellent for non-weight-bearing cardiovascular exercise and achieving maximum range of motion. It’s often used for overall fitness and conditioning.
Who Can Benefit Most?
Hydrotherapy is not just for major injuries; it helps dogs across the spectrum of age and health:
Post-Surgical Patients: Dogs recovering from TPLO, TTA, patellar luxation, or fracture repairs.
Arthritis Management: Senior dogs who need low-impact exercise to maintain mobility and muscle mass.
Neurological Conditions: Dogs with conditions like IVDD (intervertebral disc disease) or nerve damage, helping them retrain motor function.
Weight Loss: Overweight dogs who need a safe way to burn calories without straining their joints.
🛑 Finding a Qualified Practitioner
Hydrotherapy should always be overseen by a certified Canine Rehabilitation Professional (CCRP or CCRA) or a veterinary professional specializing in rehab. This ensures that the sessions are customized to your dog’s specific injury and recovery stage, maximizing benefits and avoiding complications.
If your dog is facing a long recovery or struggling with chronic pain, talk to your veterinarian about incorporating hydrotherapy. It could be the gentle yet powerful push your dog needs to get back on their paws and enjoying life!
For more information about our Posh Brace and how hydrotherapy can help please contact us via our contact form or visit us on Facebook.
Articles from the Posh Dog Knee Brace team — a group effort with our licensed veterinary technicians and brace specialists, sharing 15+ years of experience helping dogs recover from CCL/ACL injuries and mobility challenges.
Decoding Dog Food Labels: What to Look for (and Avoid) for Optimal Bone Health
As dog owners, we all want to provide the best nutrition for our furry companions. A well-balanced diet is the cornerstone of their overall health, vitality, and longevity. But when it comes to something as crucial as bone and joint health, the sheer number of dog food brands, formulations, and conflicting marketing claims can make choosing the right food feel like navigating a nutritional minefield.
The truth is, what’s inside that bag or can plays a monumental role in supporting strong bones, healthy cartilage, and resilient joints throughout your dog’s life—from playful puppyhood to their golden senior years. Improper nutrition can contribute to developmental orthopedic diseases in young dogs, exacerbate arthritis in older dogs, and even hinder recovery from injuries or surgeries.
This guide will equip you with the knowledge to confidently decode dog food labels, helping you identify what truly supports optimal bone health and what ingredients are best left on the shelf.
Understanding the Basics: AAFCO and the Ingredient List
Before diving into specifics, it’s vital to understand two foundational elements of any dog food label:
AAFCO Statement: Look for a statement from the Association of American Feed Control Officials (AAFCO). This confirms the food is “complete and balanced” for a specific life stage (e.g., “for growth,” “for adult maintenance,” “for all life stages”). This means it meets the minimum nutritional requirements for that stage.
Ingredient List Order: Ingredients are listed by weight, with the heaviest ingredients first. This gives you a good idea of the primary components of the food.
What to LOOK FOR for Optimal Bone Health
When scrutinizing a dog food label with bone and joint health in mind, prioritize these key components:
1. High-Quality Animal Protein (Listed First!)
Why it’s crucial: Protein provides the amino acids necessary for building and repairing muscle tissue, which directly supports and stabilizes joints. It also contributes to collagen production, a vital component of cartilage and connective tissues.
What to look for: The first ingredient (and ideally the first few) should be a named meat source like “chicken meal,” “lamb,” “beef,” or “salmon meal.” “Meal” forms (e.g., chicken meal) are often excellent as they’ve had water removed, making them a concentrated source of protein.
What to avoid: Generic terms like “meat by-products” or “animal digest” as the primary protein source. While not inherently bad, they are less digestible and provide less consistent nutritional value.
2. Balanced Calcium and Phosphorus Ratio (Especially for Large Breed Puppies!)
Why it’s crucial: These two minerals work hand-in-hand to build and maintain strong bones. However, their ratio is incredibly delicate. Too much calcium, especially in large and giant breed puppies, can lead to serious developmental orthopedic diseases like hip and elbow dysplasia.
What to look for:
Puppies (especially large/giant breeds): Aim for a calcium percentage between 1.0-1.5% on a dry matter basis (DMB), with a calcium-to-phosphorus ratio of 1.1:1 to 1.4:1.
Adults: A slightly broader range is acceptable, but generally avoid extremes.
Seek veterinary advice: Always consult your vet about the ideal Ca:P ratio for your dog’s specific breed and life stage.
What to avoid: Foods with excessively high calcium levels, particularly for rapidly growing large breed puppies.
3. Essential Vitamins & Minerals (Beyond Ca:P)
Vitamin D: Crucial for calcium absorption and bone mineralization.
Vitamin K: Plays a role in bone density and bone cell production.
Manganese: Essential for cartilage formation.
Copper & Zinc: Involved in collagen synthesis and bone development.
What to look for: Ensure these are present in appropriate levels. Reputable brands will formulate their food to meet these requirements, but it’s good to be aware.
4. Omega-3 Fatty Acids (EPA & DHA)
Why it’s crucial: These powerful anti-inflammatory agents are vital for joint health. They help reduce inflammation that can exacerbate arthritis and support overall cellular health.
What to look for: “Fish oil” (salmon, herring, sardine), “flaxseed,” or “algae” are good sources. Look for specific amounts of EPA and DHA listed, as these are the active forms.
What to avoid: Foods that only list “animal fat” without specifying sources of beneficial omegas.
5. Glucosamine and Chondroitin (Often a Bonus)
Why it’s crucial: These are the building blocks of cartilage, which cushions joints. While often added as supplements, some premium foods include them.
What to look for: “Glucosamine hydrochloride” and “chondroitin sulfate” listed in the ingredients, often sourced from “chicken cartilage,” “green-lipped mussel,” or “shellfish meal.”
Important Note: The amounts in food might not be therapeutic for dogs with existing joint issues, so your vet might recommend additional supplementation. However, their presence is a good sign of a joint-conscious formula.
What to AVOID for Optimal Bone Health (and Overall Health)
Just as important as knowing what to include is knowing what to exclude.
Excessive Fillers/Undefined “Meals”:
What to avoid: “Corn gluten meal” (low quality protein), “wheat middlings,” “soybean meal” (can cause digestive issues for some dogs), or “bone meal” (can skew Ca:P ratios).
Why: These often provide minimal nutritional value and can lead to digestive upset or allergies, diverting resources from optimal nutrient absorption for bone health.
Artificial Colors, Flavors, and Preservatives:
What to avoid: BHA, BHT, ethoxyquin (preservatives), “Red 40,” “Blue 2,” “Yellow 5, 6” (colors), “artificial flavor.”
Why: These offer no nutritional benefit and some have been linked to health issues, allergies, or hyper-activity in sensitive dogs. Stick to natural preservatives like tocopherols (Vitamin E).
“Mystery Meat” Ingredients:
What to avoid: “Meat and bone meal,” “animal fat” (without specified source), “poultry by-product meal” (if it’s a primary ingredient and not from a named animal).
Why: These generic terms make it impossible to know the quality, source, or consistency of the ingredients, making it difficult to assess nutritional value for bone health.
Imbalanced or Unspecified Calcium/Phosphorus:
What to avoid: Any food that doesn’t provide Ca:P percentages, or foods with extreme levels (especially high calcium for puppies).
Why: This is a red flag for bone health. Without this information, you can’t ensure your dog is getting the critical balance for skeletal development and maintenance.
Your Best Resource: Your Veterinarian
While this guide empowers you to read labels, remember that your veterinarian is your ultimate resource. They can:
Recommend specific brands or formulations tailored to your dog’s breed, age, activity level, and any existing health conditions (e.g., large breed puppy, senior dog with arthritis).
Help you understand the nuances of a label in the context of your dog’s unique needs.
Advise on any necessary supplements (like joint support) that might complement their diet.
By becoming a savvy label reader and partnering with your vet, you can make informed decisions that lay the foundation for a lifetime of strong bones, healthy joints, and joyful movement for your cherished canine companion.
If you would like more information about this or about one of our braces you can contact us via our contact form or visit us at Facebook.
Articles from the Posh Dog Knee Brace team — a group effort with our licensed veterinary technicians and brace specialists, sharing 15+ years of experience helping dogs recover from CCL/ACL injuries and mobility challenges.
Summer gardens are a riot of color, fragrance, and delicious produce. As you spend more time tending your plants and enjoying your outdoor space, it’s essential to consider your canine companion. Many common garden plants, while beautiful to us, can pose serious health risks to curious pups who might nibble on leaves, dig up roots, or even ingest fallen petals.
Before your dog’s next backyard romp, take a moment to survey your garden. Here’s a guide to common summer plants that are safe for dogs, and more importantly, those that are decidedly unsafe.
The Delightful Dozen: Dog-Safe Garden Plants
The good news is, you don’t have to sacrifice a beautiful garden to keep your dog safe! Here are some popular and vibrant plants that are generally considered non-toxic to dogs:
Sunflowers: Cheerful and iconic, sunflowers are safe for dogs.
Roses: While the thorns can be a hazard, the petals and plant itself are non-toxic.
Petunias: These popular annuals come in a variety of colors and are safe.
Snapdragons: Another colorful and non-toxic annual.
Marigolds: These often deter pests and are safe for dogs.
Cosmos: Light and airy, these daisy-like flowers are safe.
Zinnias: Bright and easy to grow, zinnias are non-toxic.
Pansies/Violas: These charming flowers are safe for canine curiosity.
Herbs (in moderation): Basil, rosemary, thyme, parsley, and dill are generally safe in small quantities. Some, like mint, can cause mild upset if eaten in large amounts.
Many Fruiting Plants (the fruit is key): Strawberries, blueberries, raspberries, watermelon (flesh only, no seeds/rind), and cantaloupe are safe. However, always be mindful of seeds/pits which can be choking hazards or toxic (like apple seeds or cherry pits).
Most Grasses: While not “plants” in the ornamental sense, common lawn grasses are safe.
Certain Vegetables: Carrots, green beans, peas, and lettuce are all dog-friendly.
The Dangerous Dozen: Plants to Avoid or Fence Off
This list is not exhaustive, but highlights some common and highly toxic garden plants. Even a small ingestion can lead to severe illness or worse.
Sago Palm: Extremely toxic! All parts are poisonous, but the seeds are particularly dangerous. Can cause liver failure, seizures, and death.
Lilies (True Lilies & Daylilies): Highly toxic to cats, but can also cause kidney damage in dogs if ingested. All parts of the plant are dangerous.
Azaleas and Rhododendrons: Ingesting even a few leaves can cause vomiting, diarrhea, weakness, heart problems, and coma.
Oleander: All parts are extremely poisonous, affecting the heart. Can be fatal.
Castor Bean: Contains ricin, a highly toxic protein. Seeds are particularly dangerous and can cause severe gastrointestinal upset, tremors, seizures, and kidney failure.
Foxglove: Contains cardiac glycosides that affect the heart, similar to digitalis. Highly toxic.
Rhubarb: While the stalks are edible for humans, the leaves are high in oxalates and are toxic to dogs, causing kidney issues.
Daffodils (especially bulbs): The bulbs, flowers, and leaves can cause vomiting, diarrhea, abdominal pain, and cardiac arrhythmias.
Tulips and Hyacinths (especially bulbs): Similar to daffodils, the bulbs are the most toxic part, causing severe gastrointestinal upset.
Autumn Crocus: Different from spring crocus, this plant is highly toxic and can cause severe gastrointestinal issues, liver and kidney damage, and bone marrow suppression.
Lily of the Valley: Contains cardiac glycosides that can cause vomiting, diarrhea, a drop in heart rate, and arrhythmias.
Marijuana/Cannabis: While technically a herb, its increasing presence means it’s a growing concern. Ingestion can cause lethargy, wobbliness, dilated pupils, and even coma.
What to Do If Your Dog Ingests a Toxic Plant:
Stay Calm: Panic won’t help your dog.
Identify the Plant: If possible, safely collect a sample of the plant your dog ingested. Take a picture.
Contact Your Vet or Pet Poison Control: Call your veterinarian immediately, or contact a pet poison control hotline (like ASPCA Animal Poison Control Center: (888) 426-4435 or Pet Poison Helpline: (855) 764-7661). There may be a consultation fee.
Follow Instructions: Do NOT try to induce vomiting unless specifically instructed by a veterinary professional.
Creating a Dog-Friendly Garden
Research Before You Plant: Always check the toxicity of new plants before bringing them into your garden.
Fencing: If you have toxic plants that you can’t remove, consider fencing them off or planting them in areas inaccessible to your dog.
Supervise: Keep an eye on your dog, especially if they are prone to chewing or digging.
Provide Safe Chew Toys: Ensure your dog has plenty of appropriate toys to chew on to deter them from mouthing plants.
By being aware and making informed choices about your garden’s flora, you can create a beautiful outdoor haven that’s safe and enjoyable for every member of your family, including the four-legged ones!
Interested in a brace more information contact us via our contact form or visit us on Facebook.
Articles from the Posh Dog Knee Brace team — a group effort with our licensed veterinary technicians and brace specialists, sharing 15+ years of experience helping dogs recover from CCL/ACL injuries and mobility challenges.
😥 Is Your Dog Crying and Whining? Unlocking the Secrets Behind Their Sounds
If you’re a dog owner, you know that our furry friends use a rich vocabulary of barks, howls, grunts, and, yes, whines and cries to communicate. While these vocalizations can sometimes sound heartbreaking, they are essential forms of expression.
Understanding why your dog is making these sounds is the first step toward meeting their needs and strengthening your bond. If you’ve ever wondered, “Why is my dog crying right now?”, this post is for you.
Here is a breakdown of the most common reasons your dog might be crying or whining.
👂 The Seven Key Reasons Your Dog Is Vocalizing
Dogs don’t have human words, so they rely on various sounds to tell us what they want, need, or how they feel. Often, a whine or a cry is their best way of getting our attention.
1. Attention-Seeking 🎾
This is often the most common and easily solved cause!
The Scenario: Your dog is staring at you while you’re on the couch, or nudging your hand.
The Message: Your dog may cry or whine to get your attention, especially if they want to play, go for a walk, or receive affection. If whining works to get a reaction, they will quickly learn to use it as a primary tool!
2. Hunger or Thirst 🍽️
Mealtime is a powerful motivator, and dogs are very good at reminding us when their routine is off.
The Scenario: The whining usually happens around their typical feeding time.
The Message: Your dog may vocalize if they are hungry or thirsty, trying to let you know it’s mealtime or that their water bowl is empty.
3. Discomfort or Pain 🤕
This is one of the most critical reasons for persistent crying, especially if it starts suddenly.
The Scenario: The whining is continuous, high-pitched, and perhaps accompanied by restlessness or reluctance to move.
The Message: If your dog is experiencing discomfort or pain due to an injury or illness, they may cry or whine to express their distress. Never ignore a sudden, unusual bout of crying.
4. Anxiety or Stress 😟
New situations or environments can be overwhelming for some dogs.
The Scenario: Whining occurs in the car, at the vet’s office, during fireworks, or when meeting new people or dogs.
The Message: Dogs may whine if they feel anxious or stressed, particularly in new or unfamiliar situations. They are trying to self-soothe or seek reassurance from you.
5. Boredom or Loneliness 😴
Dogs are social creatures and need mental and physical stimulation.
The Scenario: Your dog has been alone for a while, or they are confined to a space with no toys or interaction.
The Message: Dogs can become vocal when they are bored or lonely and seeking interaction or stimulation.
6. Separation Anxiety 💔
This goes beyond simple loneliness; it is a clinical condition that requires thoughtful management.
The Scenario: Crying or whining begins the moment you leave and continues until you return, often accompanied by destructive behavior or house-soiling.
The Message: Some dogs may cry or whine excessively when left alone due to separation anxiety, a profound distress about being separated from their primary caregivers.
7. Environmental Factors ⛈️
Dogs can be highly sensitive to their surroundings, especially loud or unexpected stimuli.
The Scenario: Crying occurs during a thunderstorm, when construction is happening outside, or near a loud appliance.
The Message: Loud noises, thunderstorms, or other environmental factors can cause dogs to cry or whine out of fear or discomfort.
🔎 When Should You Be Concerned?
While occasional whining is normal, persistent and unexplained vocalization is a sign that you need to investigate further.
If your dog is crying or whining persistently and it’s not due to an obvious reason (like needing to go outside or being hungry), it’s essential to:
Observe Their Behavior Closely: Look for other symptoms—is their appetite normal? Are they limping? Are they pacing?
Consider Recent Changes: Did you change their food? Did they have a new play session that might have caused a minor sprain? Is there a new person or pet in the house?
⚠️ The Critical Takeaway
If you suspect pain or illness (Reason #3), or if the crying is sudden, severe, and constant, do not wait. Consult with a veterinarian immediately. They can help determine if there is an underlying medical issue.
For persistent behavioral issues, such as anxiety, excessive attention-seeking, or suspected separation anxiety, a professional dog behaviorist or certified trainer can provide a customized plan and appropriate guidance or treatment.
By paying close attention to the context of your dog’s cries, you can better understand their unique language and ensure all of their needs—physical and emotional—are being met!
For more information about Posh contact us via our contact page or visit us on Facebook.
Articles from the Posh Dog Knee Brace team — a group effort with our licensed veterinary technicians and brace specialists, sharing 15+ years of experience helping dogs recover from CCL/ACL injuries and mobility challenges.
Creating a Comfortable Environment for a Dog with Knee Issues: Home Modifications and Supportive Care Tips
Seeing your once agile and playful dog struggle with knee issues can be heartbreaking. Whether they’re recovering from an injury like a CCL tear, managing arthritis, or dealing with a chronic condition like patellar luxation, creating a comfortable and supportive home environment is crucial for their well-being and recovery. By making a few thoughtful modifications and implementing supportive care practices, you can significantly improve their comfort, reduce pain, and promote healing.
Home Modifications for Enhanced Comfort and Safety for your Dog’s Knee:
The goal of home modifications is to minimize stress on your dog’s knees and prevent further injury. Consider these adjustments:
Flooring: Slippery surfaces like hardwood, tile, and laminate can be treacherous for dogs with knee problems. They can lead to slips, falls, and increased strain on the joints.
Solutions:
Rugs and Mats: Place non-slip rugs and mats in high-traffic areas, especially hallways, around their food and water bowls, and near their bed.
Runner Rugs: Use long runner rugs in hallways to provide a secure path.
Paw Treads/Grip Socks: Consider non-slip paw treads or socks for your dog to improve their grip on smooth surfaces.
Toe Grips: Something like Dr. Busby’s or similar
Elevated Food and Water Bowls: Bending down to eat and drink can put unnecessary strain on your dog’s front and hind legs, including their knees.
Solutions: Use elevated food and water bowls that allow your dog to eat and drink without having to lower their head significantly. Choose a height that is comfortable for their size.
Comfortable Bedding: A supportive and comfortable bed is essential for resting and relieving pressure on sore joints.
Solutions:
Orthopedic Dog Beds: Invest in a high-quality orthopedic dog bed made with memory foam or other supportive materials. These beds contour to your dog’s body, distributing weight evenly and reducing pressure points.
Bolster Beds: Beds with bolsters can provide extra support and a place for your dog to rest their head and neck, promoting better alignment.
Ensure Easy Access: Make sure the bed is easily accessible without requiring your dog to jump or climb.
Ramps and Stairs: Jumping on and off furniture or navigating stairs can put significant stress on compromised knees.
Solutions:
Dog Ramps: Provide ramps for easy access to couches, beds, and even in and out of the car. Choose a ramp with a non-slip surface.
Dog Stairs: If ramps aren’t feasible, consider pet stairs with wide, shallow steps that are easier for your dog to navigate. Ensure they are stable and have good traction.
Block Access: If your dog insists on jumping, temporarily block access to furniture or areas that require jumping.
Secure Outdoor Space: Ensure your outdoor space is safe and minimizes the risk of sudden twists or falls.
Solutions:
Level Ground: Stick to walks on level surfaces and avoid uneven terrain.
Short Leash: Keep your dog on a short leash during walks to prevent sudden lunges or chases.
Supervise Outdoor Play: Supervise your dog closely during outdoor playtime and discourage high-impact activities like excessive jumping or roughhousing.
No Doggy doors: Doggy doors allow free access to outside, which can delay healing and prevent recovery
Supportive Care Tips for Enhanced Comfort:
Beyond home modifications, providing consistent supportive care can make a significant difference in your dog’s comfort and well-being:
Maintain a Healthy Weight: Excess weight puts extra strain on all joints, including the knees. Work with your veterinarian to establish and maintain a healthy weight for your dog through proper diet and controlled exercise.
Gentle Exercise: While high-impact activities should be avoided, gentle, low-impact exercise like short, slow walks can help maintain muscle strength and joint mobility. Always follow your veterinarian’s recommendations for exercise.
Pain Management: Administer pain medication and anti-inflammatory drugs as prescribed by your veterinarian. Never give your dog human medications.
Physical Therapy: Consider incorporating physical therapy exercises recommended by a veterinary rehabilitation specialist. These exercises can help improve strength, flexibility, and range of motion.
Heat and Cold Therapy: Your veterinarian may recommend applying heat or cold packs to the affected knee to help reduce pain and inflammation. Follow their specific instructions for application.
Massage: Gentle massage around the knee area (avoiding direct pressure on the joint unless instructed) can help improve circulation and relax surrounding muscles.
Regular Veterinary Check-ups: Regular check-ups allow your veterinarian to monitor your dog’s condition, adjust treatment plans as needed, and identify any potential complications early on.
Patience and Understanding: Remember that your dog may be in pain and less mobile than usual. Be patient and understanding, and avoid forcing them to do anything that causes them discomfort.
Creating a Calm and Stress-Free Atmosphere:
Pain and limited mobility can sometimes lead to anxiety or frustration in dogs. Provide a calm and stress-free environment by:
Providing Quiet Resting Spaces: Ensure your dog has a quiet and comfortable place where they can retreat and rest undisturbed.
Maintaining a Routine: A predictable routine can help reduce anxiety. Stick to regular feeding times, walks (as appropriate), and rest periods.
Avoiding Overstimulation: Limit exposure to overly stimulating environments or activities that might exacerbate their pain or discomfort.
By implementing these home modifications and supportive care tips, you can create a more comfortable and safer environment for your dog with knee issues. Remember to always work closely with your veterinarian to develop a comprehensive care plan tailored to your dog’s specific needs. Your dedication and attention to their comfort will make a significant difference in their quality of life and recovery.
For more information about our Posh brace contact us via our contact form or visit us on Facebook.
Articles from the Posh Dog Knee Brace team — a group effort with our licensed veterinary technicians and brace specialists, sharing 15+ years of experience helping dogs recover from CCL/ACL injuries and mobility challenges.
From Puppy Pranks to Senior Slumbers: How the Posh Dog Knee Brace Can Support Dogs at Every Life Stage
Our canine companions enrich our lives through every stage, from the boundless energy of puppyhood to the gentle wisdom of their senior years. Just like us, their bodies experience changes and challenges throughout their lives, and the Posh Dog Knee Brace is designed to offer versatile support for their knee health, adapting to their unique needs at every age and activity level.
Puppy Power: Nurturing Healthy Joints During Growth
Puppies are bundles of uncoordinated joy, often engaging in enthusiastic play that can sometimes lead to minor bumps, strains, or even predispose them to certain joint issues later in life. While a knee brace isn’t typically a daily requirement for healthy puppies, it can be a valuable tool in specific situations:
Minor Sprains and Strains: During their exuberant explorations, puppies might experience mild knee sprains or strains. A lightweight Posh Dog Knee Brace can provide gentle compression and support during the initial healing phase, limiting excessive movement and encouraging rest without overly restricting their natural puppy wiggles.
Predisposition to Joint Issues: Certain breeds are predisposed to conditions like patellar luxation. If your puppy shows early signs or during specific activities, a brace (as recommended by your vet) can offer external support to help stabilize the kneecap and potentially mitigate the severity of the condition as they grow.
Post-Injury Support: If a young dog unfortunately experiences a more significant knee injury, a brace can be an integral part of their recovery plan, providing stability and protecting the healing tissues as they regain mobility.
The Active Adult: Maintaining Peak Performance and Preventing Injury
Adult dogs, especially those who are active in sports, hiking, or even just enthusiastic backyard zoomies, put their knees through a lot. The Posh Dog Knee Brace can be a proactive and reactive tool for this life stage:
Support During High-Impact Activities (Prophylactic Use – Vet Recommended): For highly athletic dogs or those prone to knee issues, a brace might be recommended by a veterinarian for use during strenuous activities to provide extra stability and potentially reduce the risk of injury.
Managing Mild to Moderate Injuries: Sprains, strains, or early signs of ligament issues can benefit from the support and compression of a Posh Dog Knee Brace, aiding in healing and allowing the dog to remain active within controlled limits (as advised by their vet).
Post-Exercise Recovery: After intense activity, a brace can provide gentle compression to help reduce swelling and support muscle recovery around the knee joint.
Supporting Existing Conditions: For adult dogs diagnosed with conditions like mild patellar luxation or early-stage arthritis, a brace can offer ongoing support and pain management during walks and playtime.
Senior Slumbers: Providing Comfort and Stability and Support in Golden Years
As dogs enter their senior years, wear and tear on their joints can lead to conditions like osteoarthritis, making movement more challenging and sometimes painful. The Posh Dog Knee Brace can significantly improve their comfort and mobility:
Pain Management for Arthritis: The gentle compression and support of the brace can help alleviate pain and stiffness associated with arthritis in the knee joint, making walks and daily activities more comfortable.
Improved Stability for Weakened Joints: Senior dogs may experience muscle weakness and joint instability. A brace can provide external support, reducing the risk of falls and injuries due to wobbly knees.
Support During Gentle Exercise: Maintaining gentle exercise is still important for senior dogs. A brace can provide the necessary support to make short, controlled walks more manageable and enjoyable.
Post-Surgery Support (if needed): Even senior dogs may require knee surgery in some cases. A brace can be just as crucial in their post-operative recovery, providing stability and aiding healing.
Enhanced Comfort During Rest: Some senior dogs find the gentle compression of a brace comforting even while resting, providing a sense of stability and warmth to the joint.
Versatility Across Breeds and Activity Levels:
The Posh Dog Knee Brace is designed with versatility in mind. With proper sizing and adjustable straps, it can be adapted to fit various breeds and body types. Whether you have a small terrier with a tendency for patellar luxation or a large Labrador recovering from a ligament strain, there’s a Posh Dog Knee Brace that can offer the right level of support.
Important Note: While the Posh Dog Knee Brace offers support for various life stages and situations, it’s crucial to emphasize that it is not a substitute for veterinary care. Any signs of lameness, pain, or discomfort should always be evaluated by a veterinarian for an accurate diagnosis and a comprehensive treatment plan. The Posh Dog Knee Brace is a valuable tool that can complement veterinary care and enhance your dog’s comfort and recovery at any age.
Investing in a Posh Dog Knee Brace is investing in your dog’s well-being throughout their life’s journey. From supporting healthy joint development in puppies to providing comfort and stability in their senior years, our brace is designed to adapt to their changing needs, helping them live a happier, more active, and comfortable life, no matter their age or activity level. For more information about our brace you can contact us via our contact form or visit us on Facebook.
Articles from the Posh Dog Knee Brace team — a group effort with our licensed veterinary technicians and brace specialists, sharing 15+ years of experience helping dogs recover from CCL/ACL injuries and mobility challenges.
Investing in Your Dog’s Future: The Long-Term Cost-Effectiveness of a Quality Dog Knee Brace
When your furry companion faces a knee injury, your primary concern is their comfort and recovery. However, the financial implications of ongoing treatment can also weigh heavily on your mind. While the initial investment in a high-quality dog knee brace might seem like an added expense, it’s crucial to consider its potential long-term cost-effectiveness compared to other management options like continuous medication, repeated veterinary visits, or even the possibility of future surgeries.
Let’s break down the potential costs and benefits to help you make an informed decision about investing in your dog’s future mobility:
The Recurring Costs of Ongoing Medication:
For chronic knee conditions like arthritis or the long-term management of a previous injury, veterinarians often prescribe pain relievers and anti-inflammatory medications. While these can provide relief, they come with recurring costs:
Monthly Prescription Fills: Depending on the medication and dosage, monthly prescription costs can range from $30 to $100 or more. Over months and years, this can accumulate to a significant sum.
Potential Side Effects and Additional Medications: Some long-term medications can have side effects, requiring additional medications to manage them, further increasing costs.
Regular Veterinary Check-ups for Monitoring: To ensure the medication is effective and to monitor for potential side effects, regular veterinary check-ups are necessary, adding to the ongoing expense.
The Expense of Repeated Veterinary Visits:
Knee problems often require multiple veterinary visits for diagnosis, treatment adjustments, and monitoring. These costs can quickly add up:
Initial Consultation and Examination Fees: Each visit incurs a consultation fee.
Diagnostic Tests: X-rays, blood work, and other diagnostic tests to assess the condition and monitor its progression can be costly.
Follow-up Appointments: Regular check-ups to assess progress and adjust treatment plans are often necessary.
Emergency Visits for Flare-Ups: Unexpected flare-ups of pain or lameness can lead to costly emergency veterinary visits.
The High Cost of Potential Surgery:
For more severe knee injuries like a torn cruciate ligament or persistent patellar luxation, unfortunately surgery is still (not always) often the recommended course of action. Surgery comes with a significant upfront cost:
Surgical Fees: The cost of the surgery itself can range from $5,000 to $7,000 or more, depending on the complexity and location.
Anesthesia and Monitoring: Anesthesia and careful monitoring during and after surgery are essential and contribute to the overall cost.
Post-Operative Medications and Supplies: Pain relievers, antibiotics, and other post-operative supplies add to the expense.
Rehabilitation Therapy: Physical therapy is often crucial for a successful recovery after knee surgery, incurring additional costs per session.
Potential for Revision Surgeries: In some cases, complications or re-injury can necessitate costly revision surgeries.
The Long-Term Cost-Effectiveness of a Quality Knee Brace:
A high-quality dog knee brace, while requiring an initial investment, can offer significant long-term cost savings and benefits:
Reduced Reliance on Medication: By providing support and stability, a brace can help manage pain and potentially reduce the need for long-term medication, leading to substantial savings on prescription costs.
Fewer Veterinary Visits for Chronic Management: A well-managed condition with the aid of a brace may require less frequent veterinary visits for pain management adjustments.
Potential to Delay or Avoid Surgery: In some cases of mild to moderate injuries or chronic conditions, consistent support from a brace, combined with conservative management, might help delay or even avoid the need for costly surgery.
Support During Post-Operative Rehabilitation: A brace, as part of a post-operative plan, can aid in healing and potentially reduce the need for extensive and costly physical therapy sessions.
Prevention of Re-Injury: By providing ongoing support, a brace can help protect the knee joint from further injury, potentially preventing future veterinary costs associated with re-aggravation.
Improved Quality of Life and Activity Levels: A comfortable and supportive brace can help your dog maintain a better quality of life and stay more active, potentially reducing the risk of other health issues associated with inactivity.
Durability and Longevity: A quality brace made from durable materials is designed to last, providing support for an extended period without the recurring costs associated with medication or frequent veterinary visits.
Making the Investment:
Choosing a high-quality knee brace from a reputable provider ensures you’re investing in a product designed for durability, comfort, and effective support. While the initial cost might be higher than a basic wrap, the long-term benefits in terms of reduced medication expenses, fewer vet visits, and potentially avoiding surgery can make it a cost-effective solution in the long run.
Conclusion:
When considering the best course of action for your dog’s knee problems, it’s essential to look beyond the immediate costs. A quality knee brace can be a valuable investment in your dog’s future health and mobility, potentially saving you significant money on ongoing medication, repeated veterinary visits, and the high cost of surgery. By providing consistent support and aiding in long-term management, a well-chosen knee brace can contribute to a happier, healthier, and more active life for your beloved companion, ultimately proving to be a cost-effective decision. Always consult with your veterinarian to determine the most appropriate treatment plan for your dog’s specific needs. For more information you can contact us via our contact form or visit us on Facebook.
Articles from the Posh Dog Knee Brace team — a group effort with our licensed veterinary technicians and brace specialists, sharing 15+ years of experience helping dogs recover from CCL/ACL injuries and mobility challenges.
Decoding Dog Lameness: A Visual Guide to Identifying Different Gaits and When a Brace Might Be Necessary
As devoted pet owners, we pride ourselves on knowing our dogs inside and out. But sometimes, subtle changes in their movement can be easily missed. Lameness, or an abnormal gait, is a key indicator of potential pain or injury, and recognizing the nuances can help you seek timely veterinary care and consider supportive options like a knee brace.
This visual guide will help you understand different types of canine gaits and when a closer look – and potentially a veterinary visit – is warranted. While we can’t embed actual videos or interactive images directly in this text-based format, we’ll describe what to look for and encourage you to search online for video examples using the terms provided.
Understanding Normal Canine Gait:
Before we delve into abnormal gaits, it’s essential to understand what a healthy dog’s walk and trot look like:
Walk: A four-beat gait where each foot moves independently in a regular rhythm (left hind, left front, right hind, right front). The head and neck typically move with a gentle up-and-down motion.
Visual Cue: Imagine a smooth, even flow of movement.
Trot: A two-beat diagonal gait where the opposite front and hind legs move together (left hind and right front together, then right hind and left front together). The head and neck will have a more pronounced up-and-down movement to maintain balance.
Visual Cue: Look for a balanced, rhythmic bounce.
Recognizing Abnormal Gaits (Lameness):
Lameness can range from subtle head bobs to a complete inability to bear weight. Here’s a breakdown of common lameness patterns that might indicate a knee problem:
1. Head Bob:
What to Look For: Watch your dog as they trot. If they consistently lift their head when the sound limb strikes the ground, it’s often a sign of forelimb lameness. Conversely, if they lift their head when the lame limb strikes the ground, it’s often a sign of hind limb lameness, potentially involving the knee. The head bob is a compensatory mechanism to shift weight away from the painful limb.
Visual Search Term: “dog head bob lameness”
Knee Connection: Pain in the knee can cause your dog to shift weight onto their other hind leg, resulting in a head bob that coincides with the affected leg bearing weight.
What to Look For: Your dog completely avoids putting weight on one of their legs. They will hop or carry the affected limb entirely off the ground.
Visual Search Term: “dog three legged gait”
Knee Connection: Severe knee pain, a complete ligament tear, or a recent post-operative state can cause a dog to completely avoid putting weight on the injured leg.
3. Shorter Stride Length:
What to Look For: Compare the length of your dog’s steps with each hind leg. A shorter stride on one side, especially at a trot, can indicate pain or restricted movement in that limb.
Knee Connection: Pain or stiffness in the knee can prevent the leg from extending fully, resulting in a shorter stride.
4. Reduced Range of Motion:
What to Look For: Observe the degree to which your dog bends and extends their knee joint during walking and trotting. A noticeably reduced range of motion compared to the other leg could indicate pain, swelling, or mechanical restriction.
Knee Connection: Conditions like arthritis, swelling after injury, or post-surgical stiffness can limit the knee’s normal range of motion.
5. Hip Hike or Pelvic Tilt:
What to Look For: As your dog walks, you might notice their hip on the affected side lifting higher than the other (“hip hike”) or their pelvis tilting. This is another compensatory mechanism to reduce weight-bearing on the painful hind limb.
Visual Search Term: “dog hip hike lameness” or “dog pelvic tilt lameness”
Knee Connection: Pain originating in the knee can cause these compensatory movements in the pelvis and hip.
6. Toe-Touching or Subtle Weight Shifting:
What to Look For: In milder cases of lameness, your dog might still touch their toes to the ground but put very little weight on the affected limb. You might also notice a subtle shift in their weight distribution while standing.
Visual Search Term: “dog subtle hind limb lameness”
Knee Connection: Early stages of a knee injury or mild discomfort might present with this subtle weight shifting.
When Might a Brace Be Necessary?
Recognizing these gait abnormalities is the first step. The decision to use a knee brace should always be made in consultation with your veterinarian. However, here are some scenarios where a knee brace might be recommended as part of a comprehensive treatment plan:
Post-Surgical Support: After knee surgery (e.g., CCL repair, patellar luxation surgery), a brace can provide stability, protect the healing tissues, and control the range of motion during rehabilitation.
Conservative Management of Mild to Moderate Injuries: In some cases of ligament sprains, mild arthritis, or patellar subluxation, a brace can offer support, reduce pain, and improve stability without surgery.
Chronic Conditions like Arthritis: For dogs with chronic knee pain due to arthritis, a brace can provide ongoing support, reduce discomfort during activity, and potentially slow down the progression of the condition.
Support During Rehabilitation: As part of a physical therapy program, a brace can help support weakened muscles and encourage proper movement patterns.
Dogs Not Suitable for Surgery: In some cases where surgery isn’t an option due to age or other health concerns, a brace can provide palliative support and improve quality of life.
Important Considerations:
Veterinary Diagnosis is Key: Never self-diagnose your dog’s lameness. A thorough veterinary examination is essential to determine the underlying cause.
Proper Fit is Crucial: A poorly fitting brace can be ineffective or even cause further problems. Follow measuring instructions carefully and consider professional fitting if available.
Gradual Introduction: Introduce the brace gradually and monitor your dog’s comfort level.
Conclusion:
Becoming familiar with different canine gaits and recognizing subtle signs of lameness can empower you to seek timely veterinary attention for your dog. If a knee problem is diagnosed, understanding when a brace might be a beneficial tool can help you work collaboratively with your veterinarian to create the best possible recovery and management plan for your beloved companion. By being observant and proactive, you can help ensure your dog stays happy, healthy, and moving comfortably for years to come.
For more information you can contact us via our contact form or visit us on Facebook.
Articles from the Posh Dog Knee Brace team — a group effort with our licensed veterinary technicians and brace specialists, sharing 15+ years of experience helping dogs recover from CCL/ACL injuries and mobility challenges.